My Sony A7SII Camera Settings | How to Setup your Sony A7SII

I've had my SONY A7SII or A7S2 for about 3 weeks now and being new to Sony cameras, it was imperative that I learnt about each function and where to easily find each setting. When out on the streets of London shooting StreetStyle images you need to know exactly how to setup and change your camera settings based on the lighting, weather and subject promptly. Not only that but so often when shooting outside the lighting changes and therefore you have to make small adjustments to your camera settings to combat this. If you take 5 minutes to change settings, especially in London you would have missed the moment and the chances are the lighting would have changed again. So before using any camera, I recommend learning about each setting and what effect it has on your stills and video filming.
So here is how I currently setup my SONY A7SII Camera and I'll run through a few of the settings and why I have chosen those options.
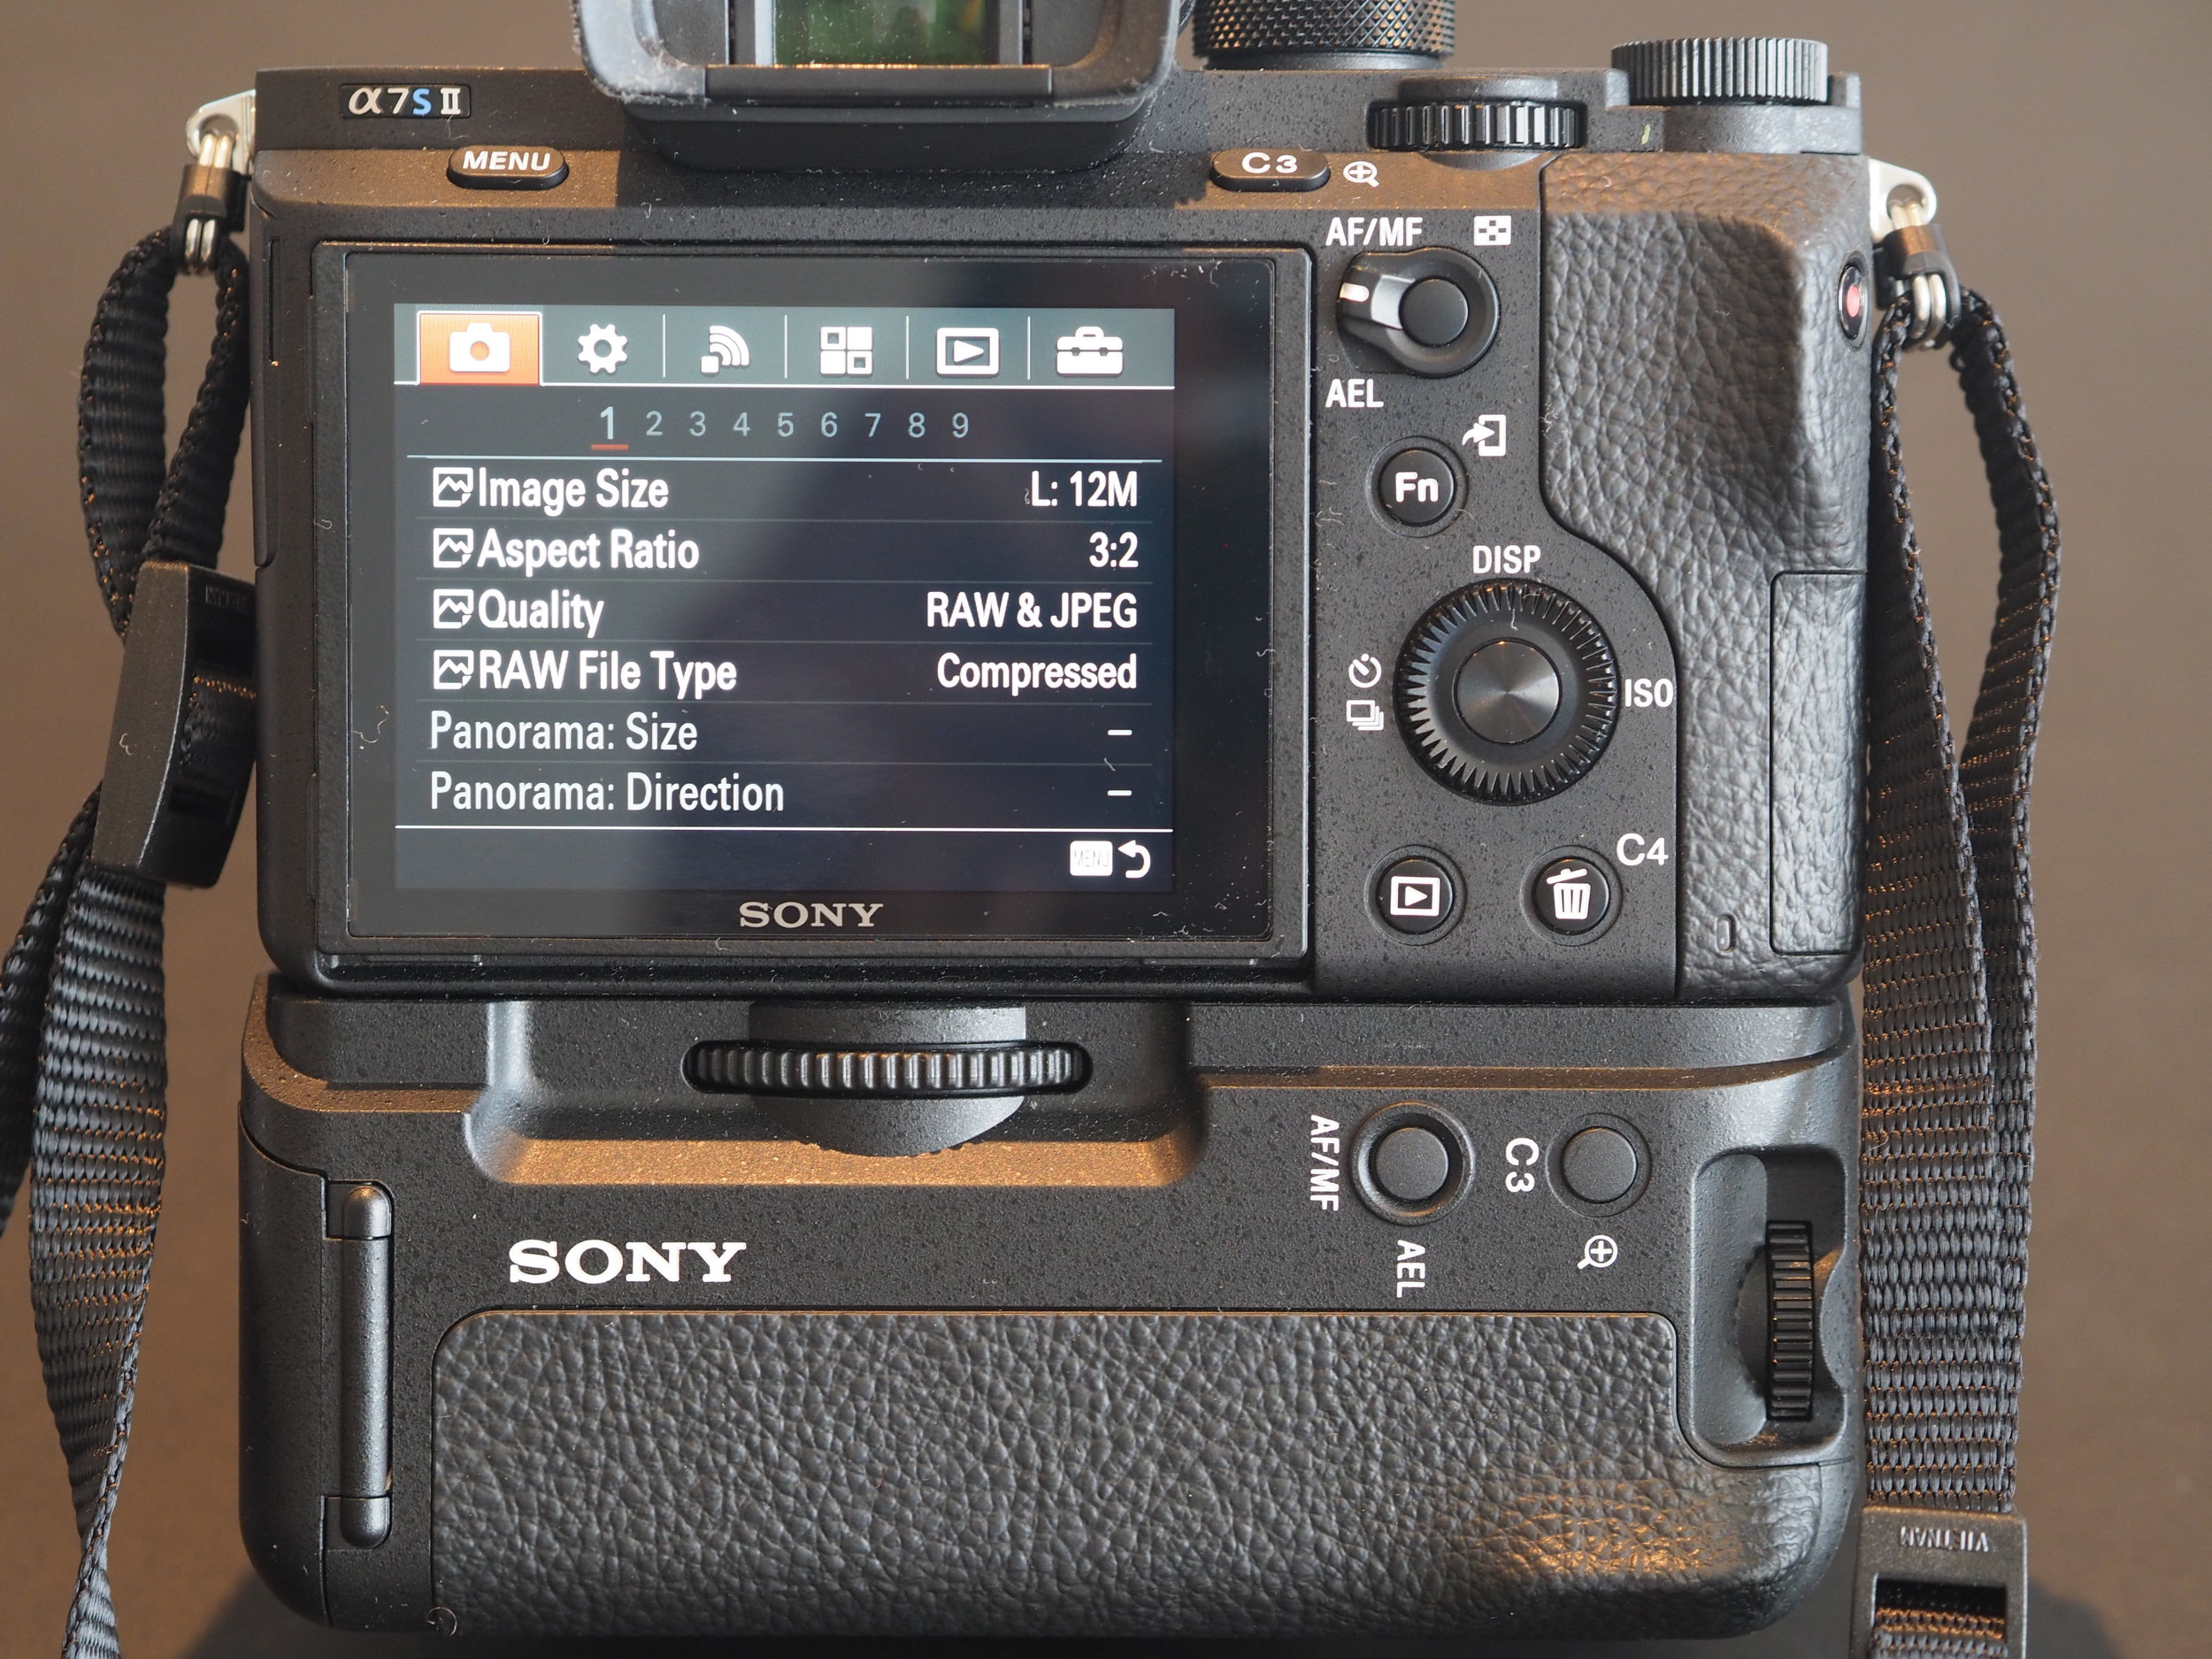
Currently I shoot RAW & JPEG. When I'm doing campaign work for brands I'll shoot and post edit in RAW however if shooting street style for other people and they are doing the editing, it is good to have a JPEG copy too. Image size as Large and Aspect Ratio 3:2 are pretty standard options if you have a large enough SD card to handle the extra space needed.
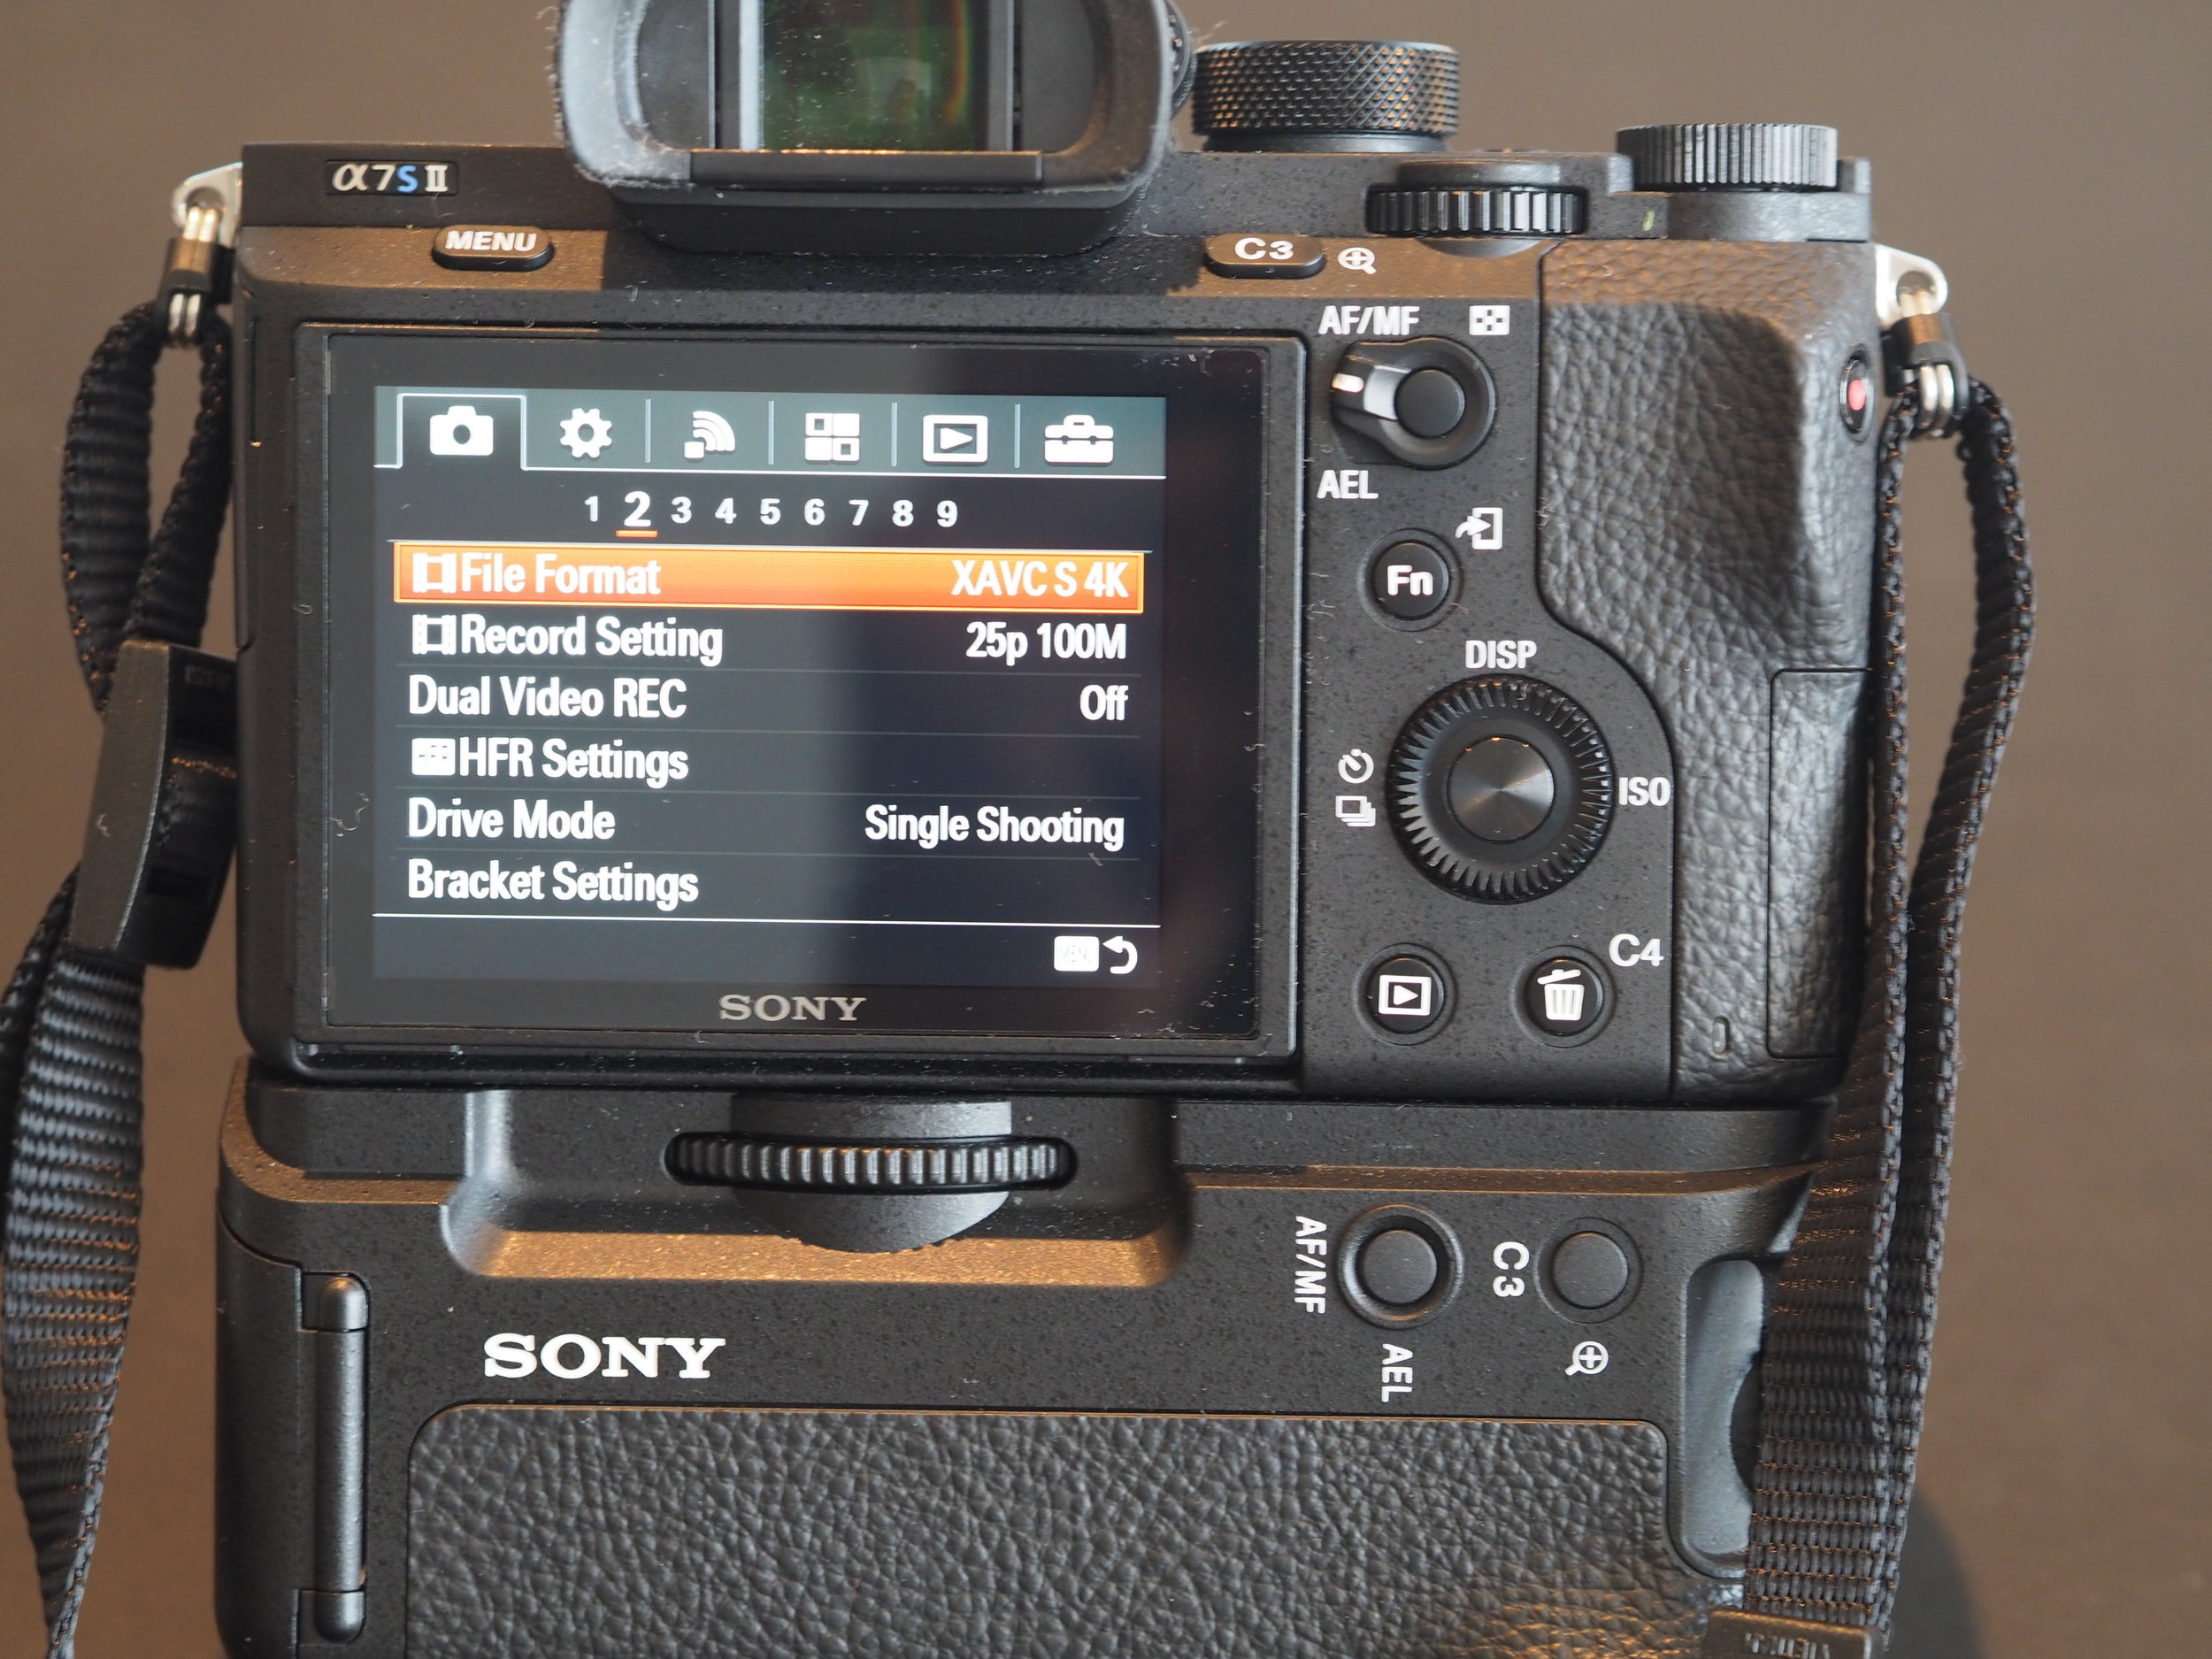
{Video} File format is XAVC S 4K for high-end 4K video production quality and a {Video} Record Setting of 25p 100M, although I would recommend a 128GB SD card when recording in these modes. Also it is worth noting that you'll require a U3 SD Card (UHS Speed Class) to handle the write speed and frame rate.
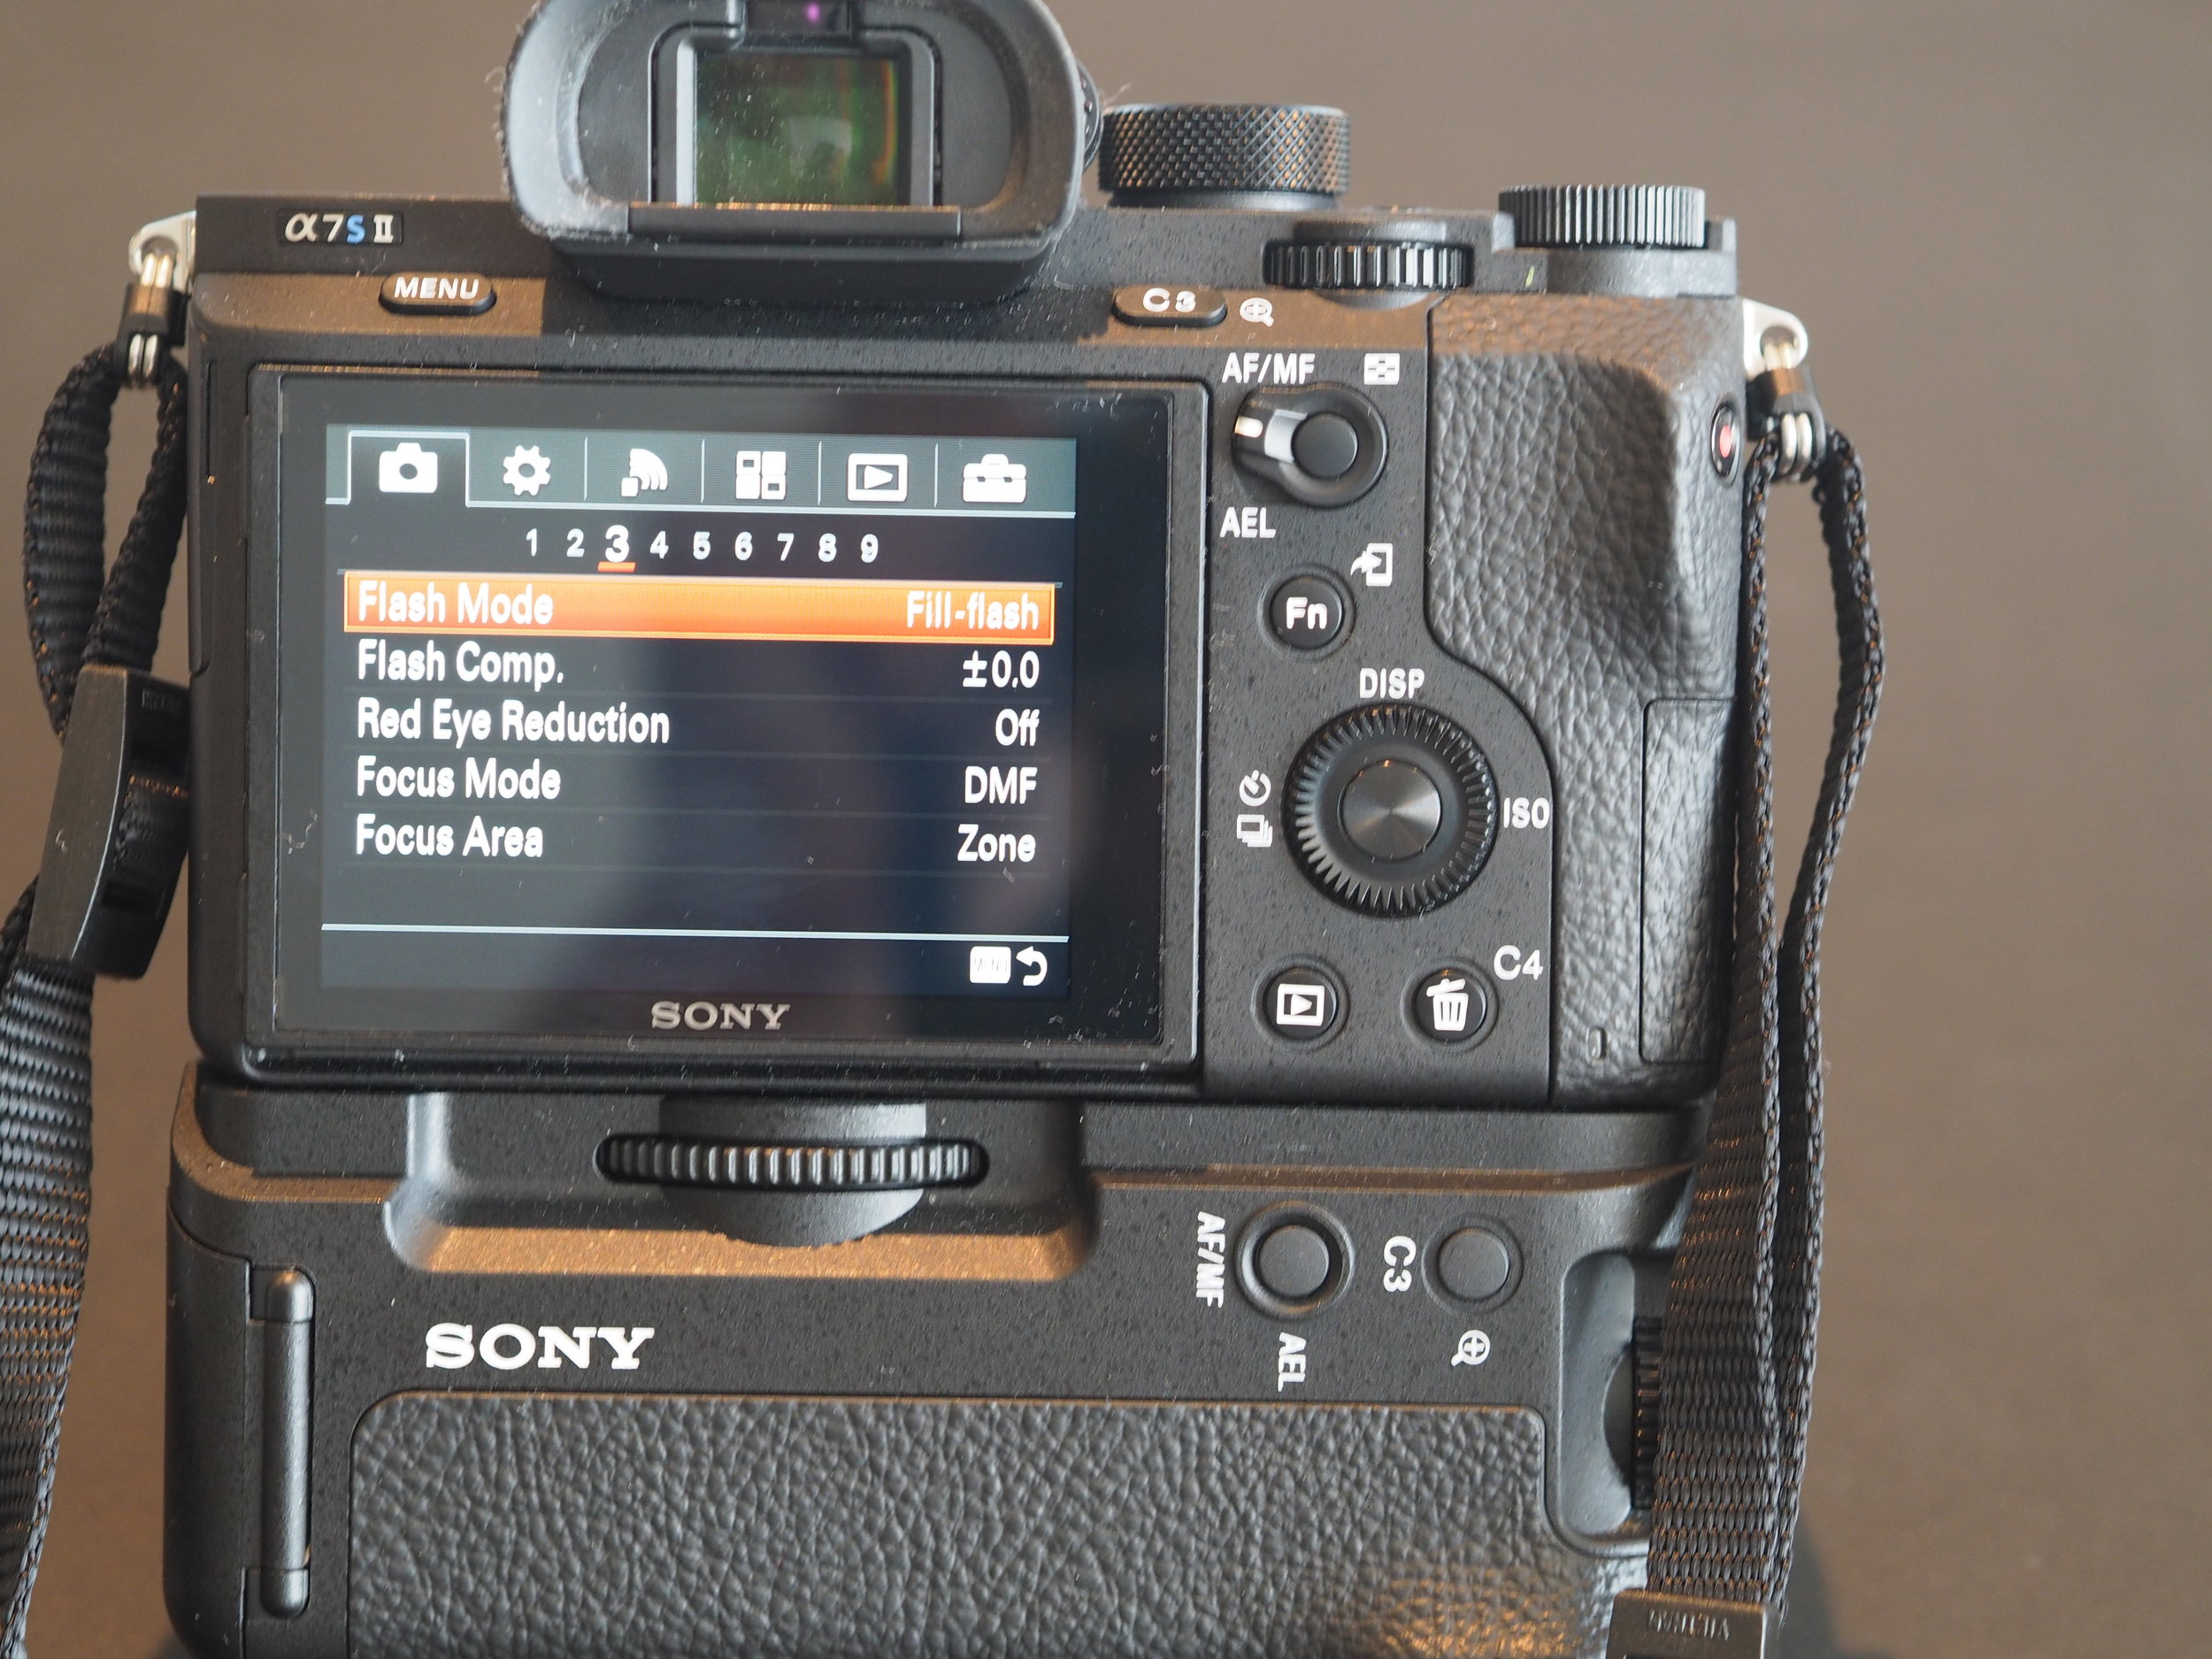
On page 3, my Focus Mode is DMF, which is basically Manual Focus, but I change from AF-S which is Single shot Auto Focus to DMF depending on the type of shoot I'm doing. Always manual focus for filming. The Focus Area is currently set to Zone, which is good for movement such as street style or sports although change this option to a fixed area if you need to focus on a watch or product for example.
The SONY A7SII has a cool feature on page 4 of the Picture Settings which is Auto-ISO it is very accurate, although I normally leave mine on ISO200 (as I love to shoot this ISO if possible) and I have setup the Control Wheel to change the ISO quickly during shooting.

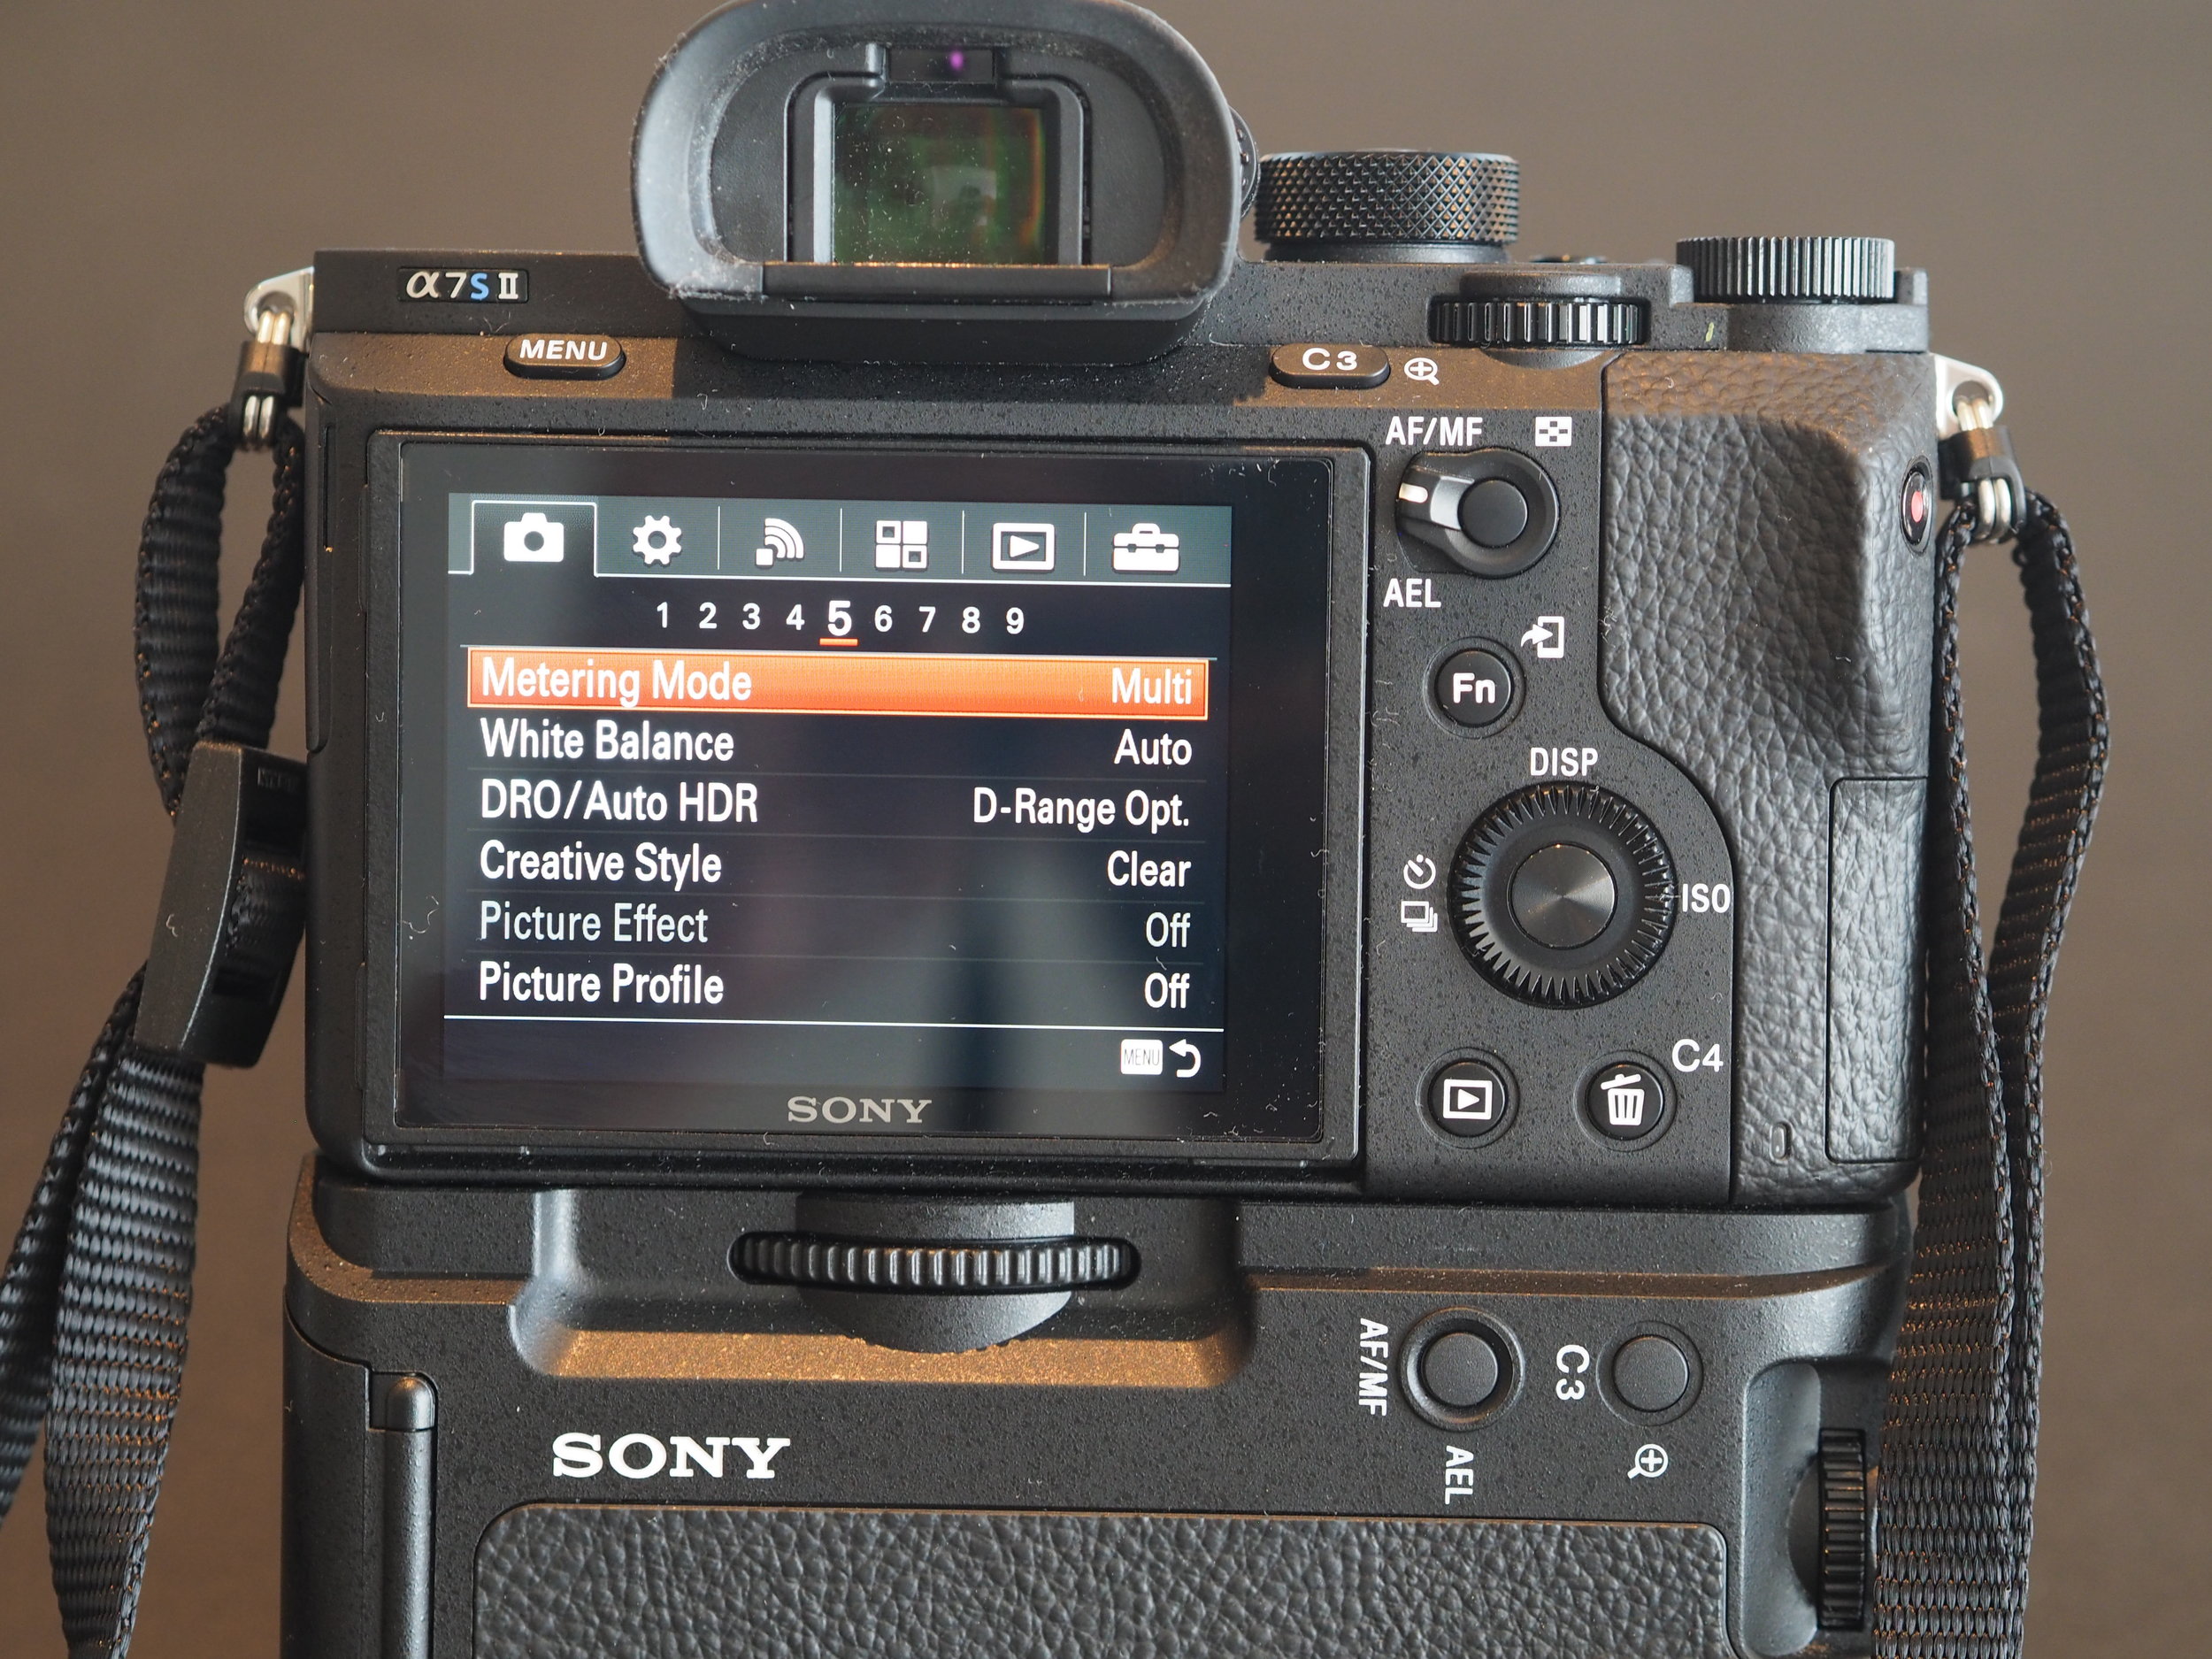
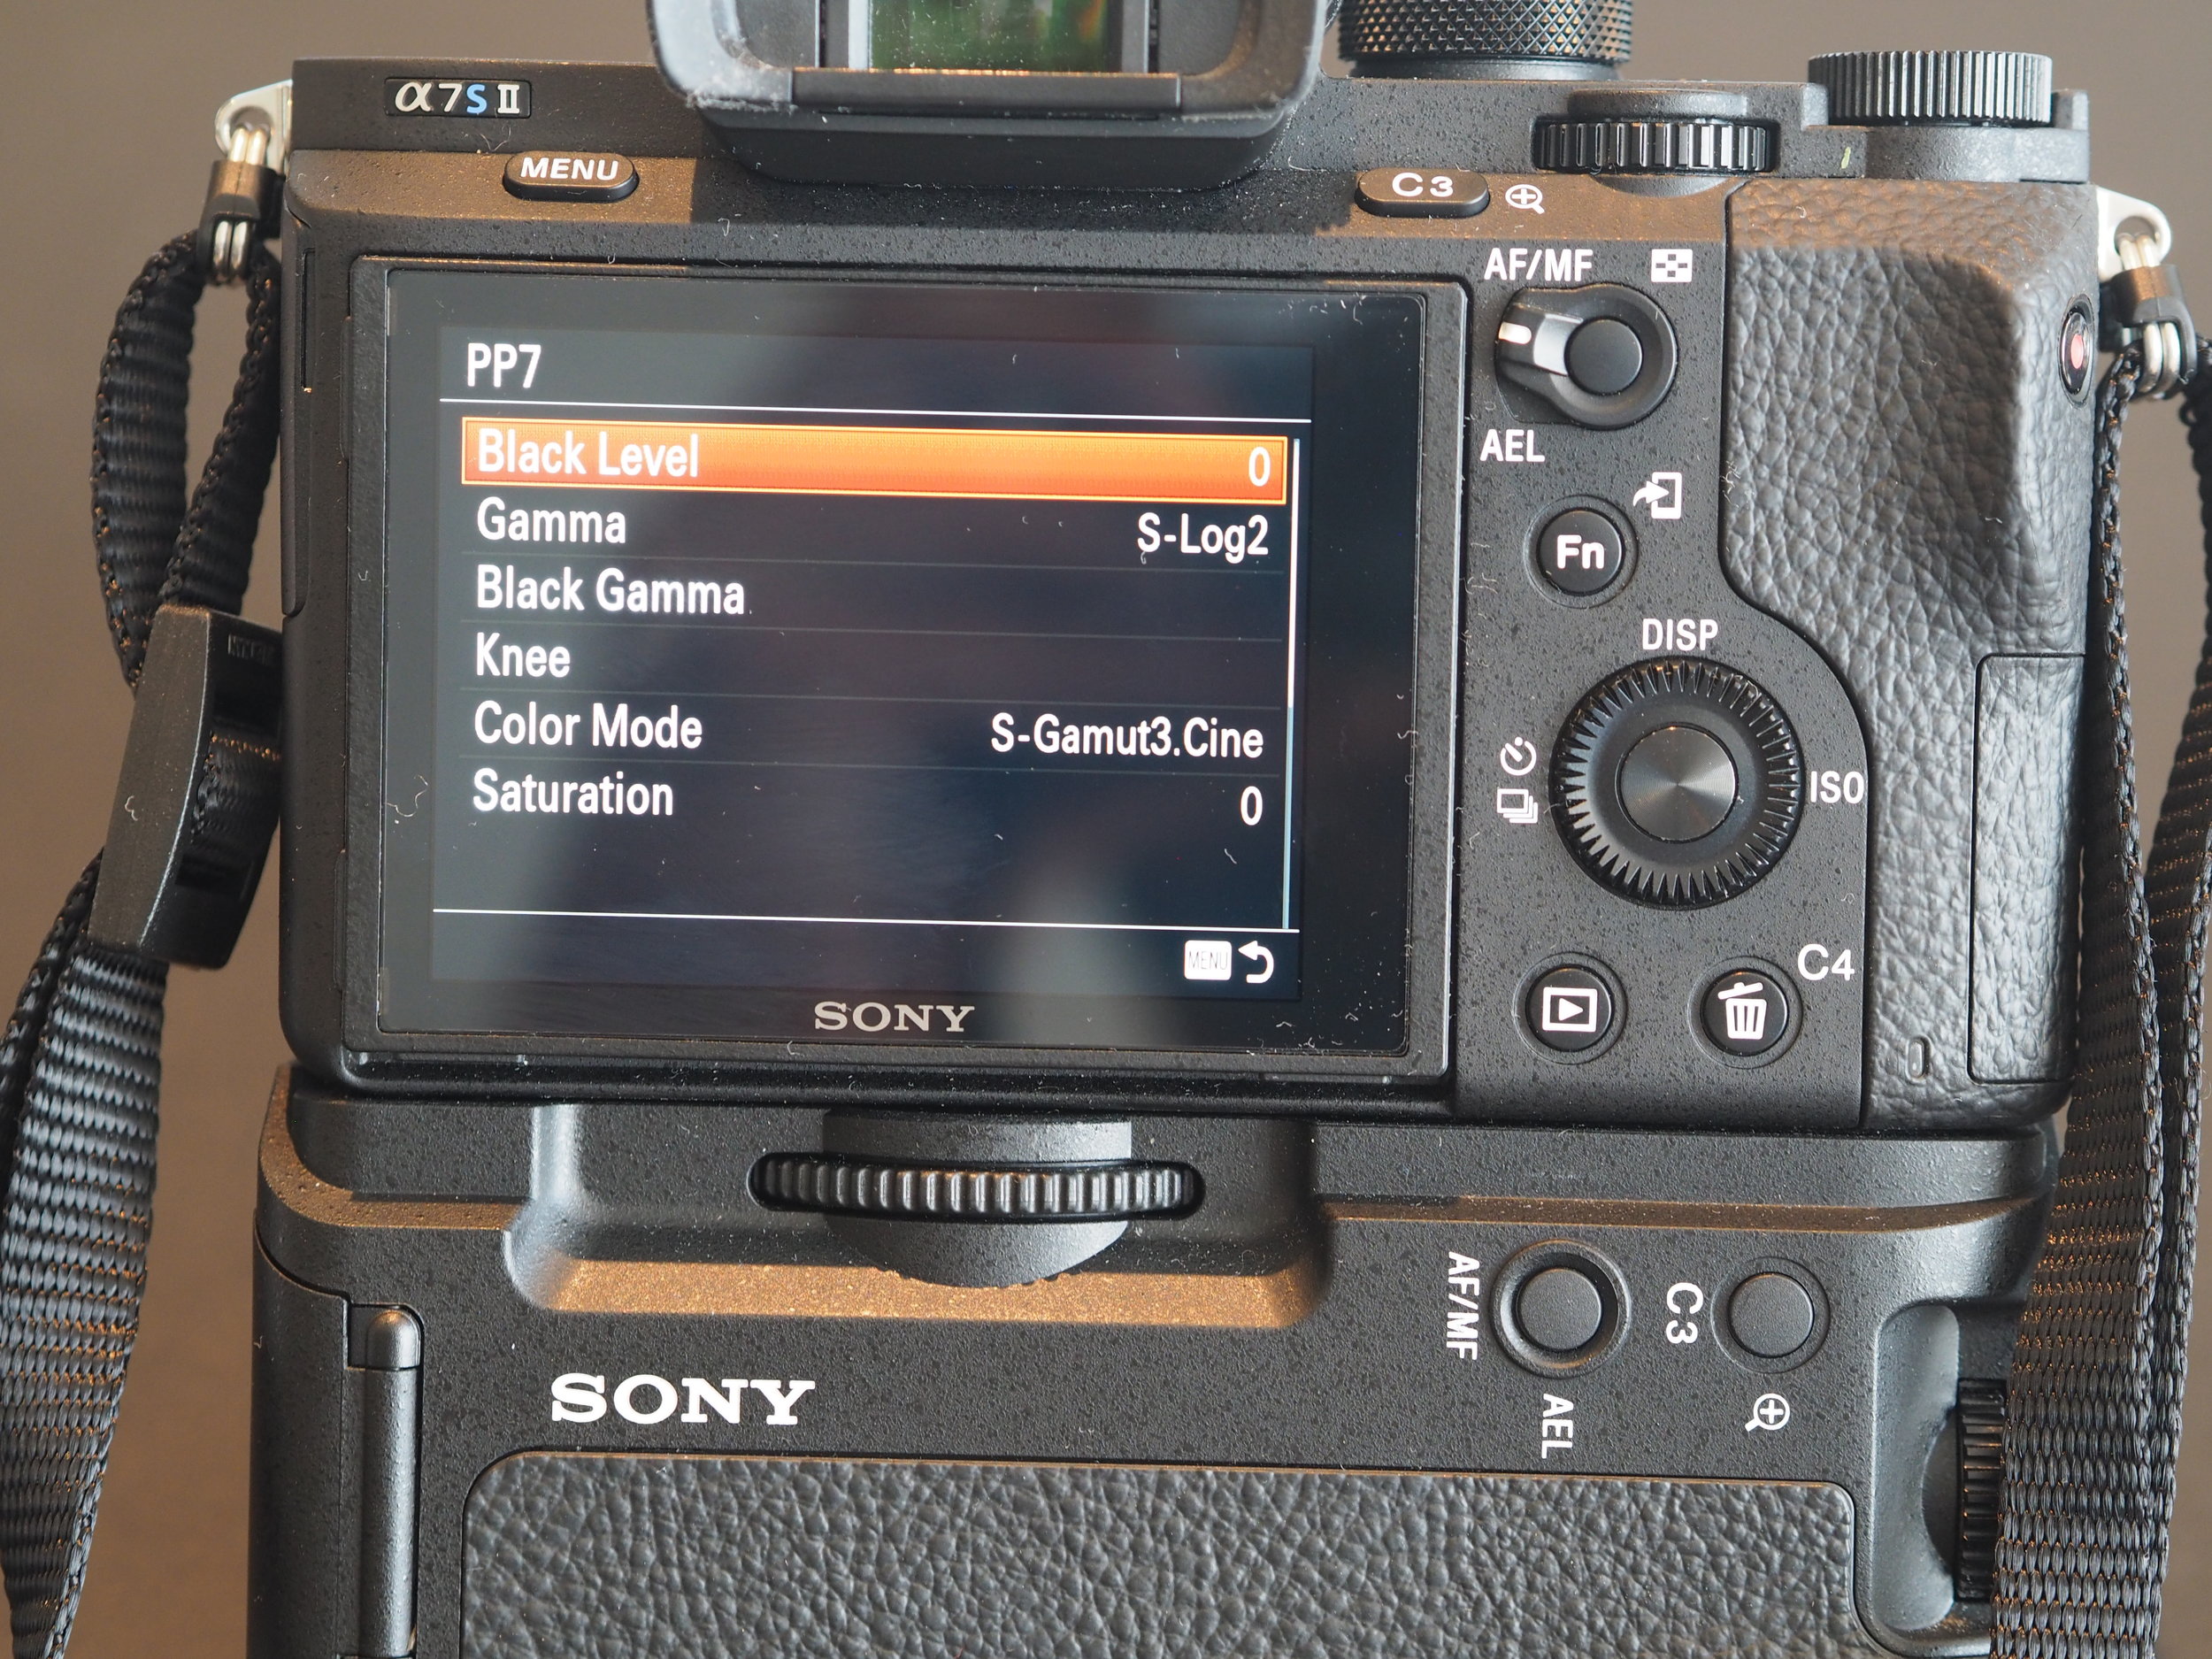
On Page 5, if the Picture Profile is set to OFF, I like to set the cameras' Creative Style option to Clear, as this gives the images more sharpness, so when photographing buildings and design, you'll get a great finish. Alternatively if I want the perfect image and I have plenty of time to colour correct in post production on Photoshop CS6, I will use a Picture Profile of PP7. In the PP7 profile I have set the Gamma setting to S-Log2 and the Color Mode to S-Gamut3.Cine. When using this mode, your images may seem very flat, cloudy, grey and desaturated although once you do the colour correcting in Lightroom or Photoshop, you'll end up with an incredible finish.
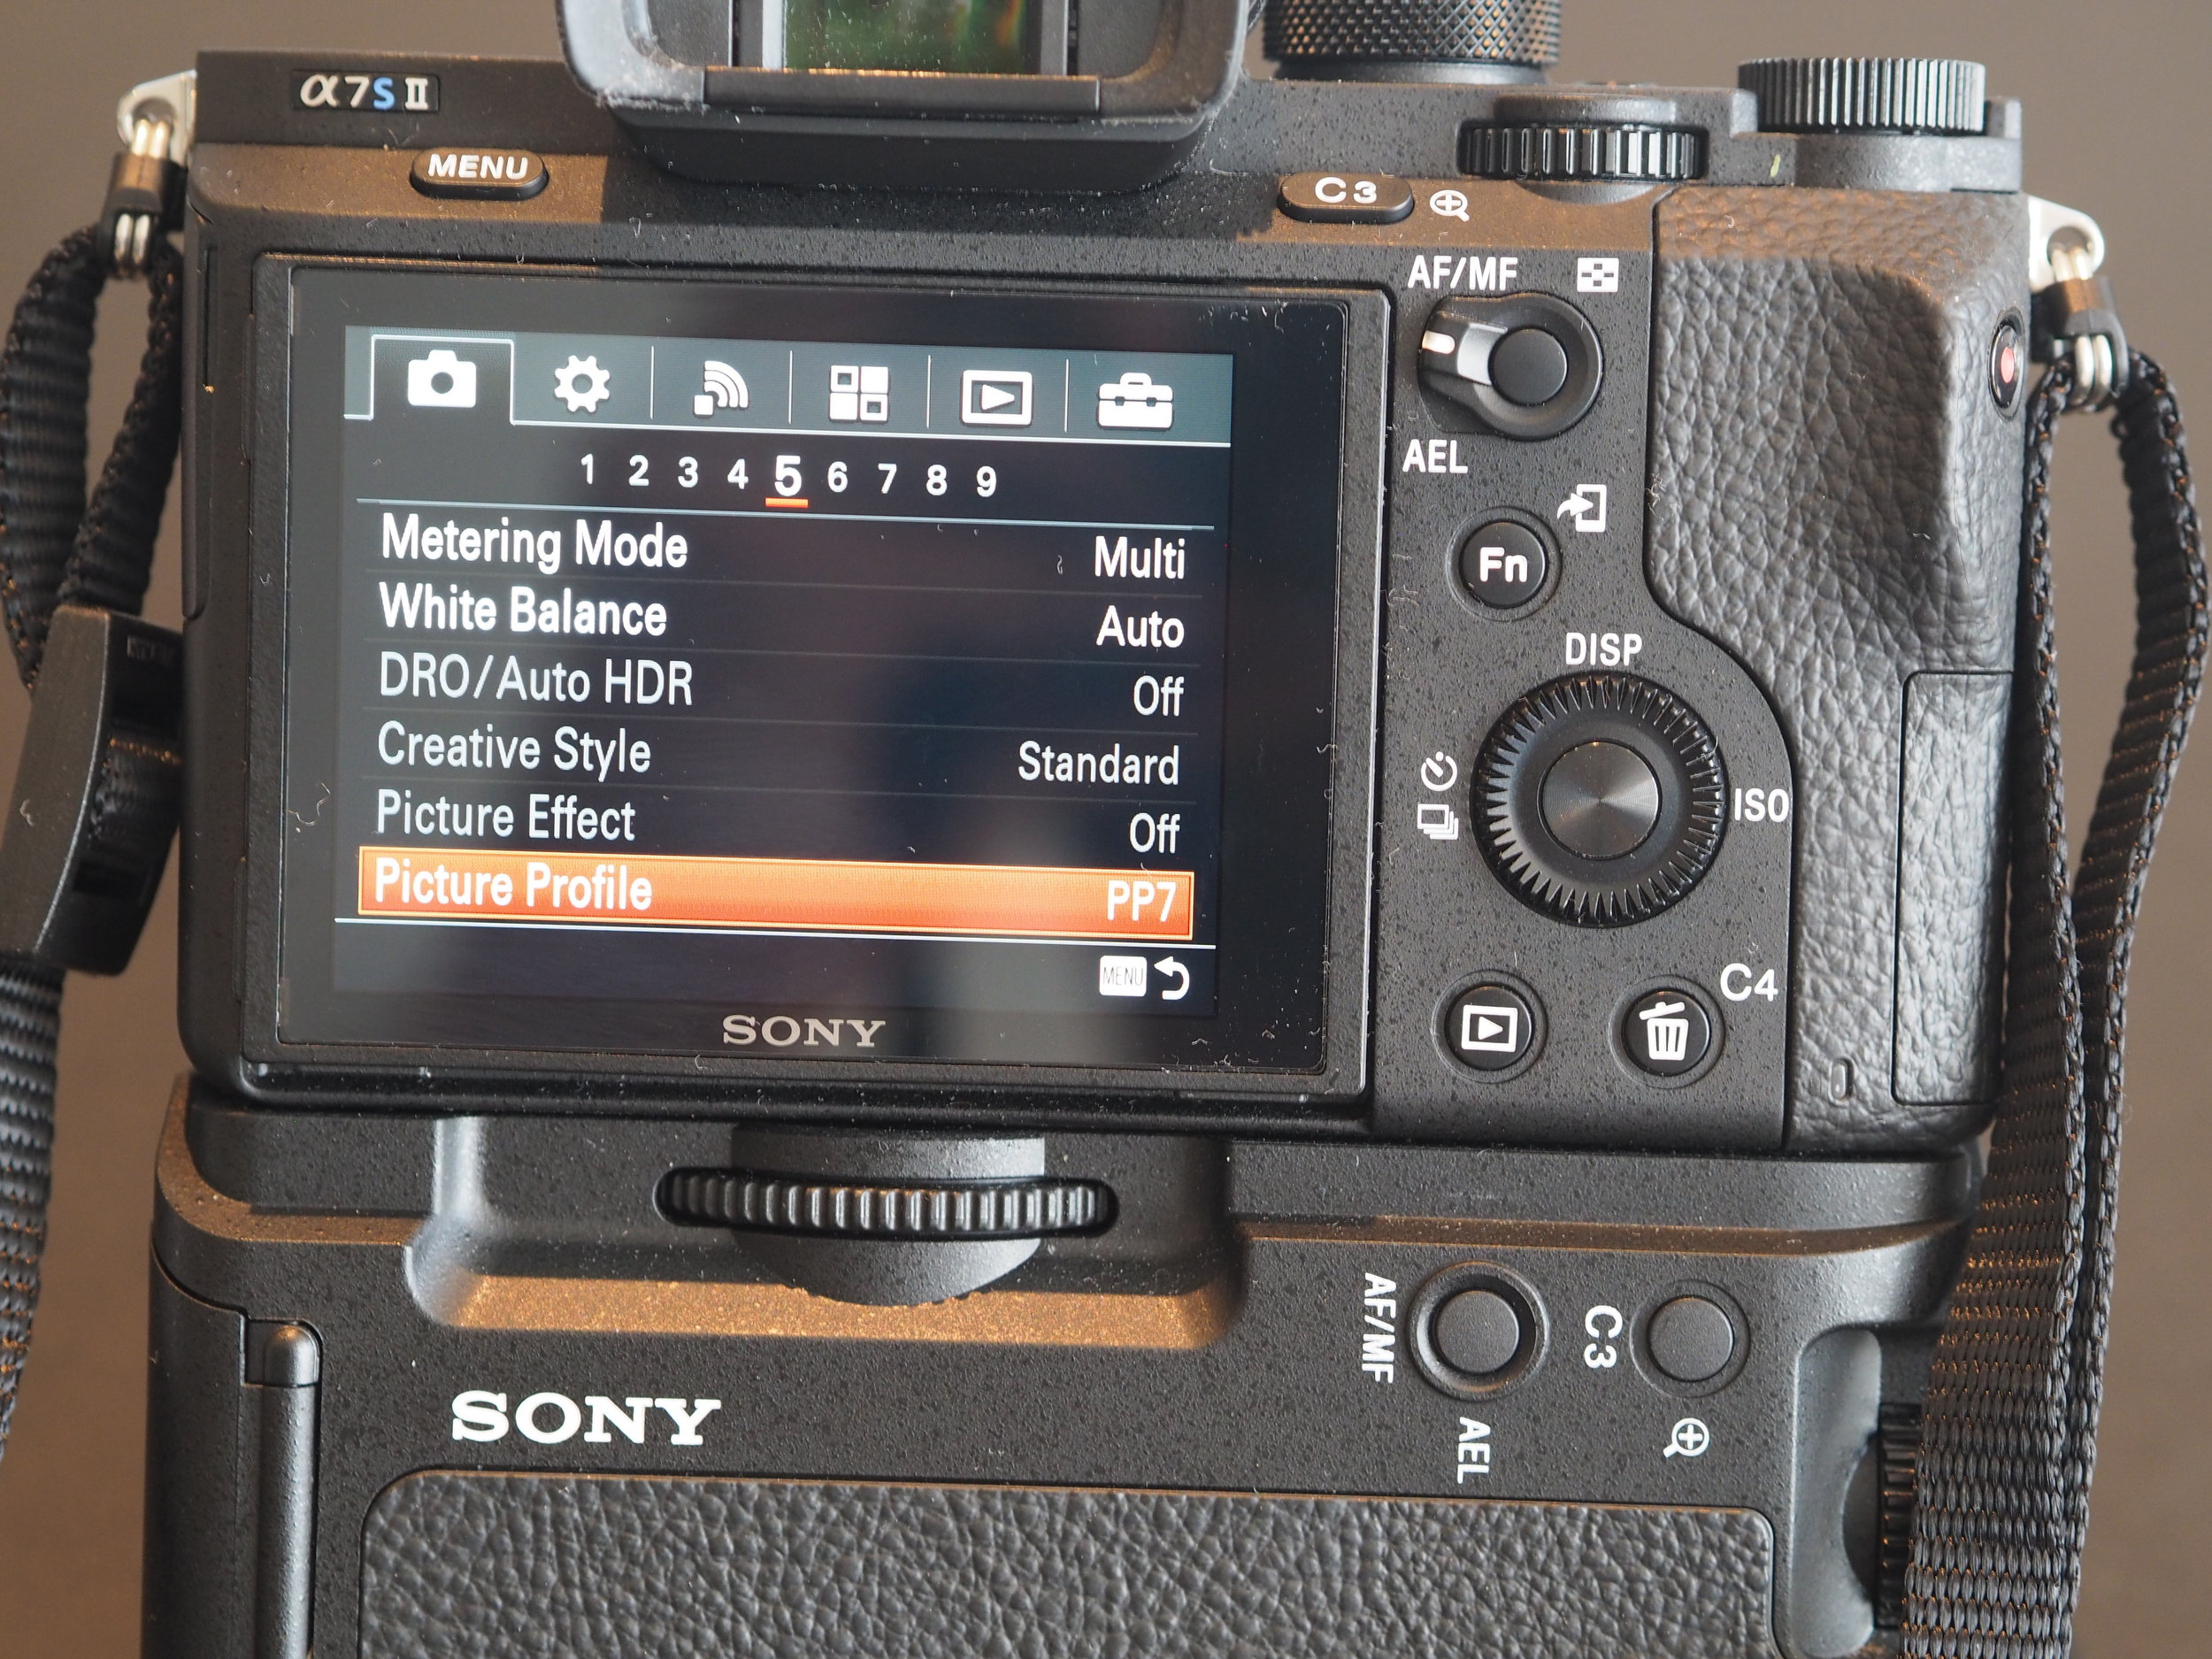
A lot of the other settings are pretty default, although on Page 5 again, I have left the White Balance as Auto although programmed my Custom (C1) button to easily change this which is especially good when shooting in dark, cloudy, grey days. You'll find out how to change your Custom Buttons in the section below.
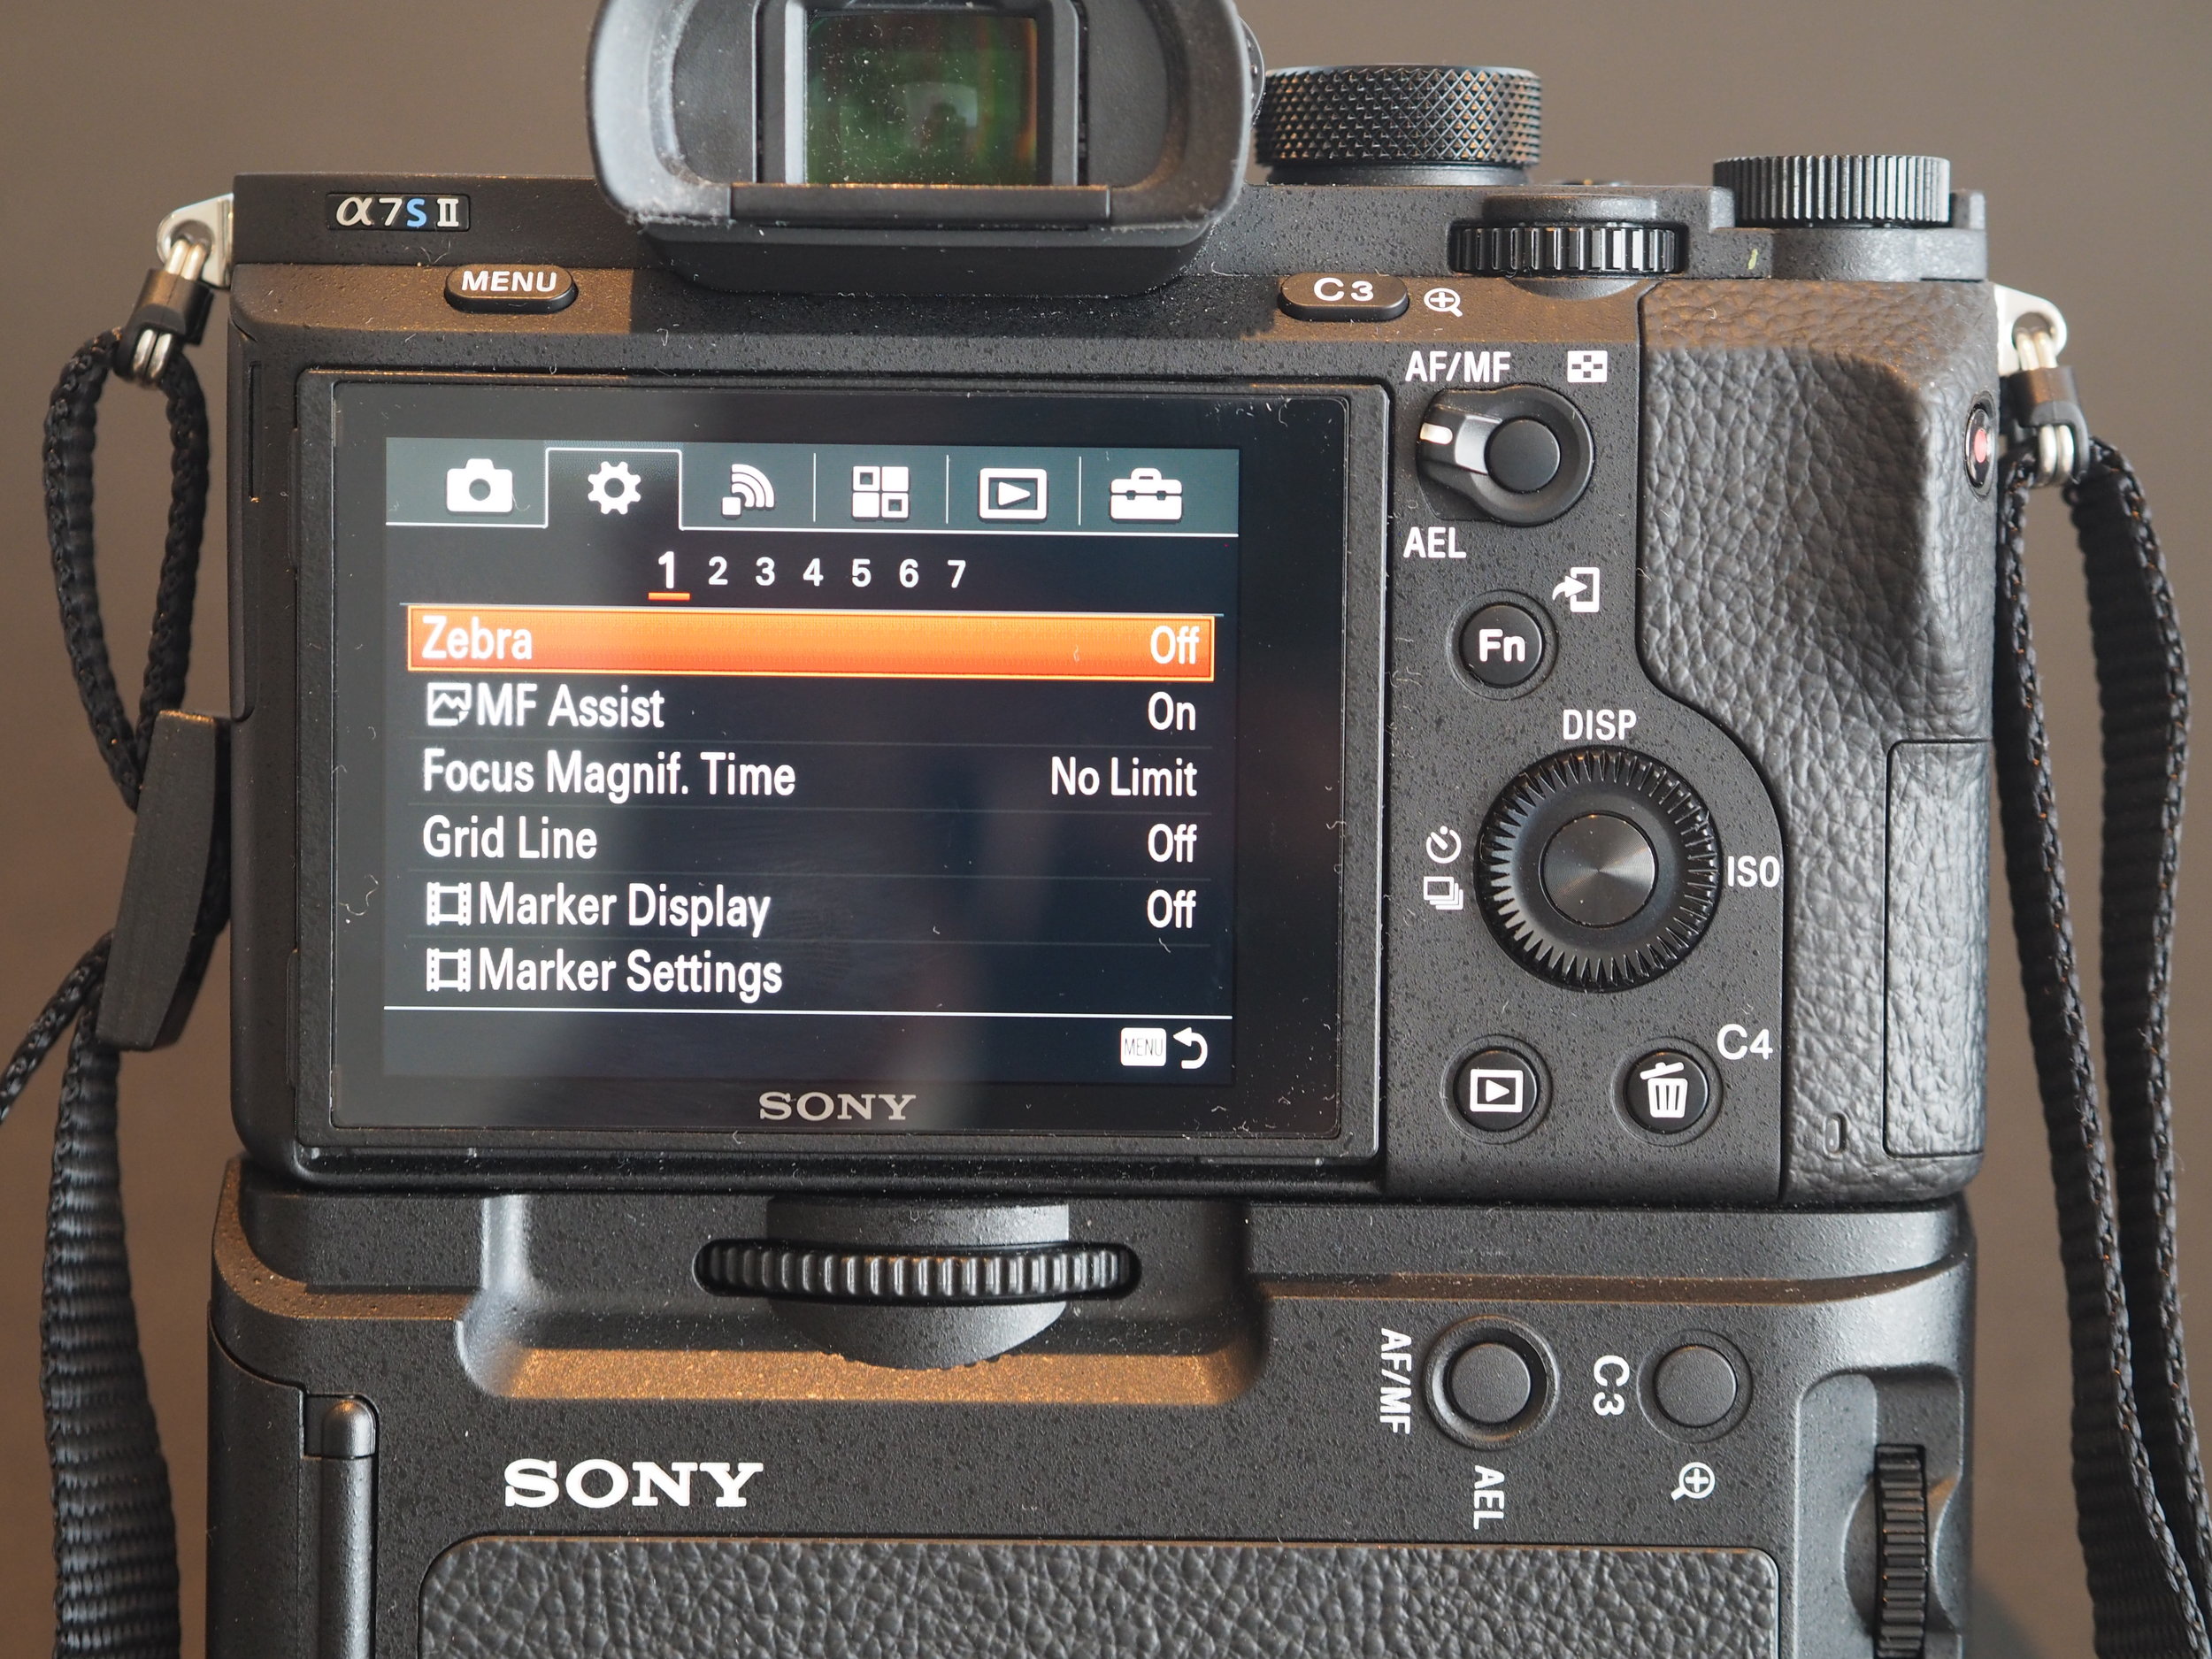


Moving on to the next set of settings. On page 1, the Grid Line is Off, although a good option here would be to set it to Rule of Thirds if you have trouble with framing.
On Page 2, I have set the Auto Review setting to 2 Sec, which when taking a photo it reviews on the monitor screen for a two second review or preview.
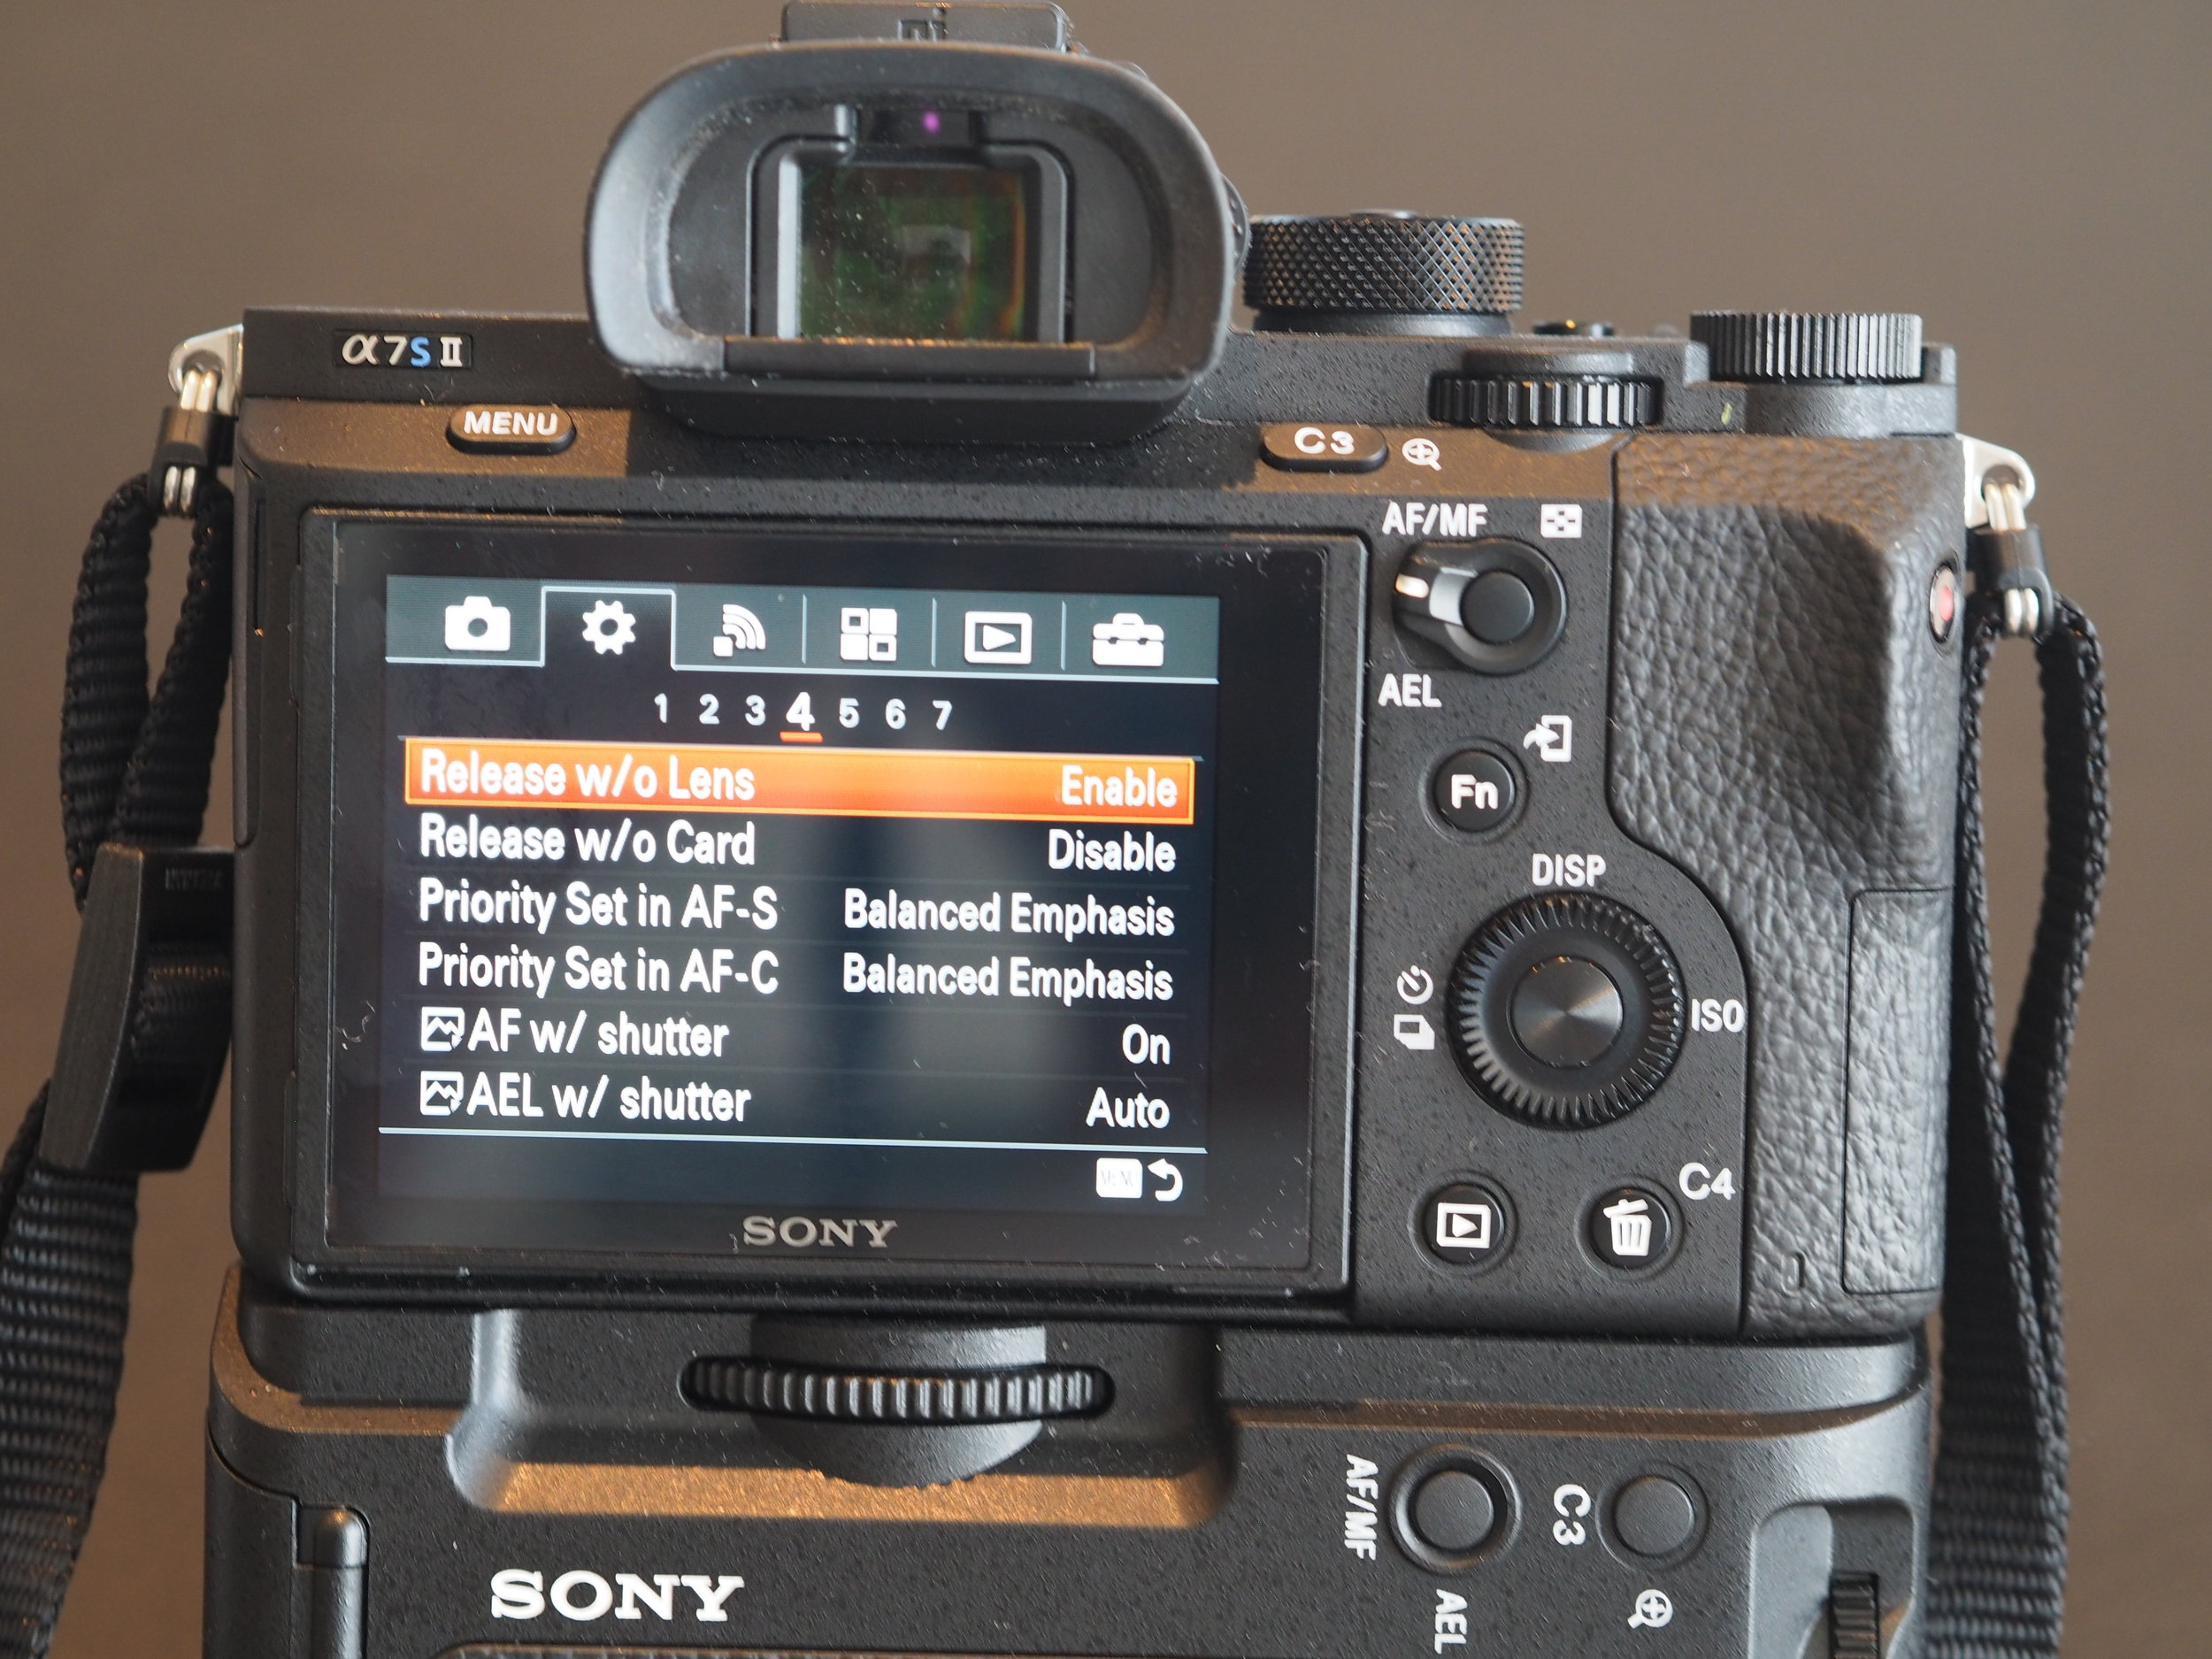
On Page 4, change the setting Release w/o Card to Disable, this will not allow you to take photos without a memory card inserted - very handy if you are swapping SD cards between cameras and you might forget to put it back.
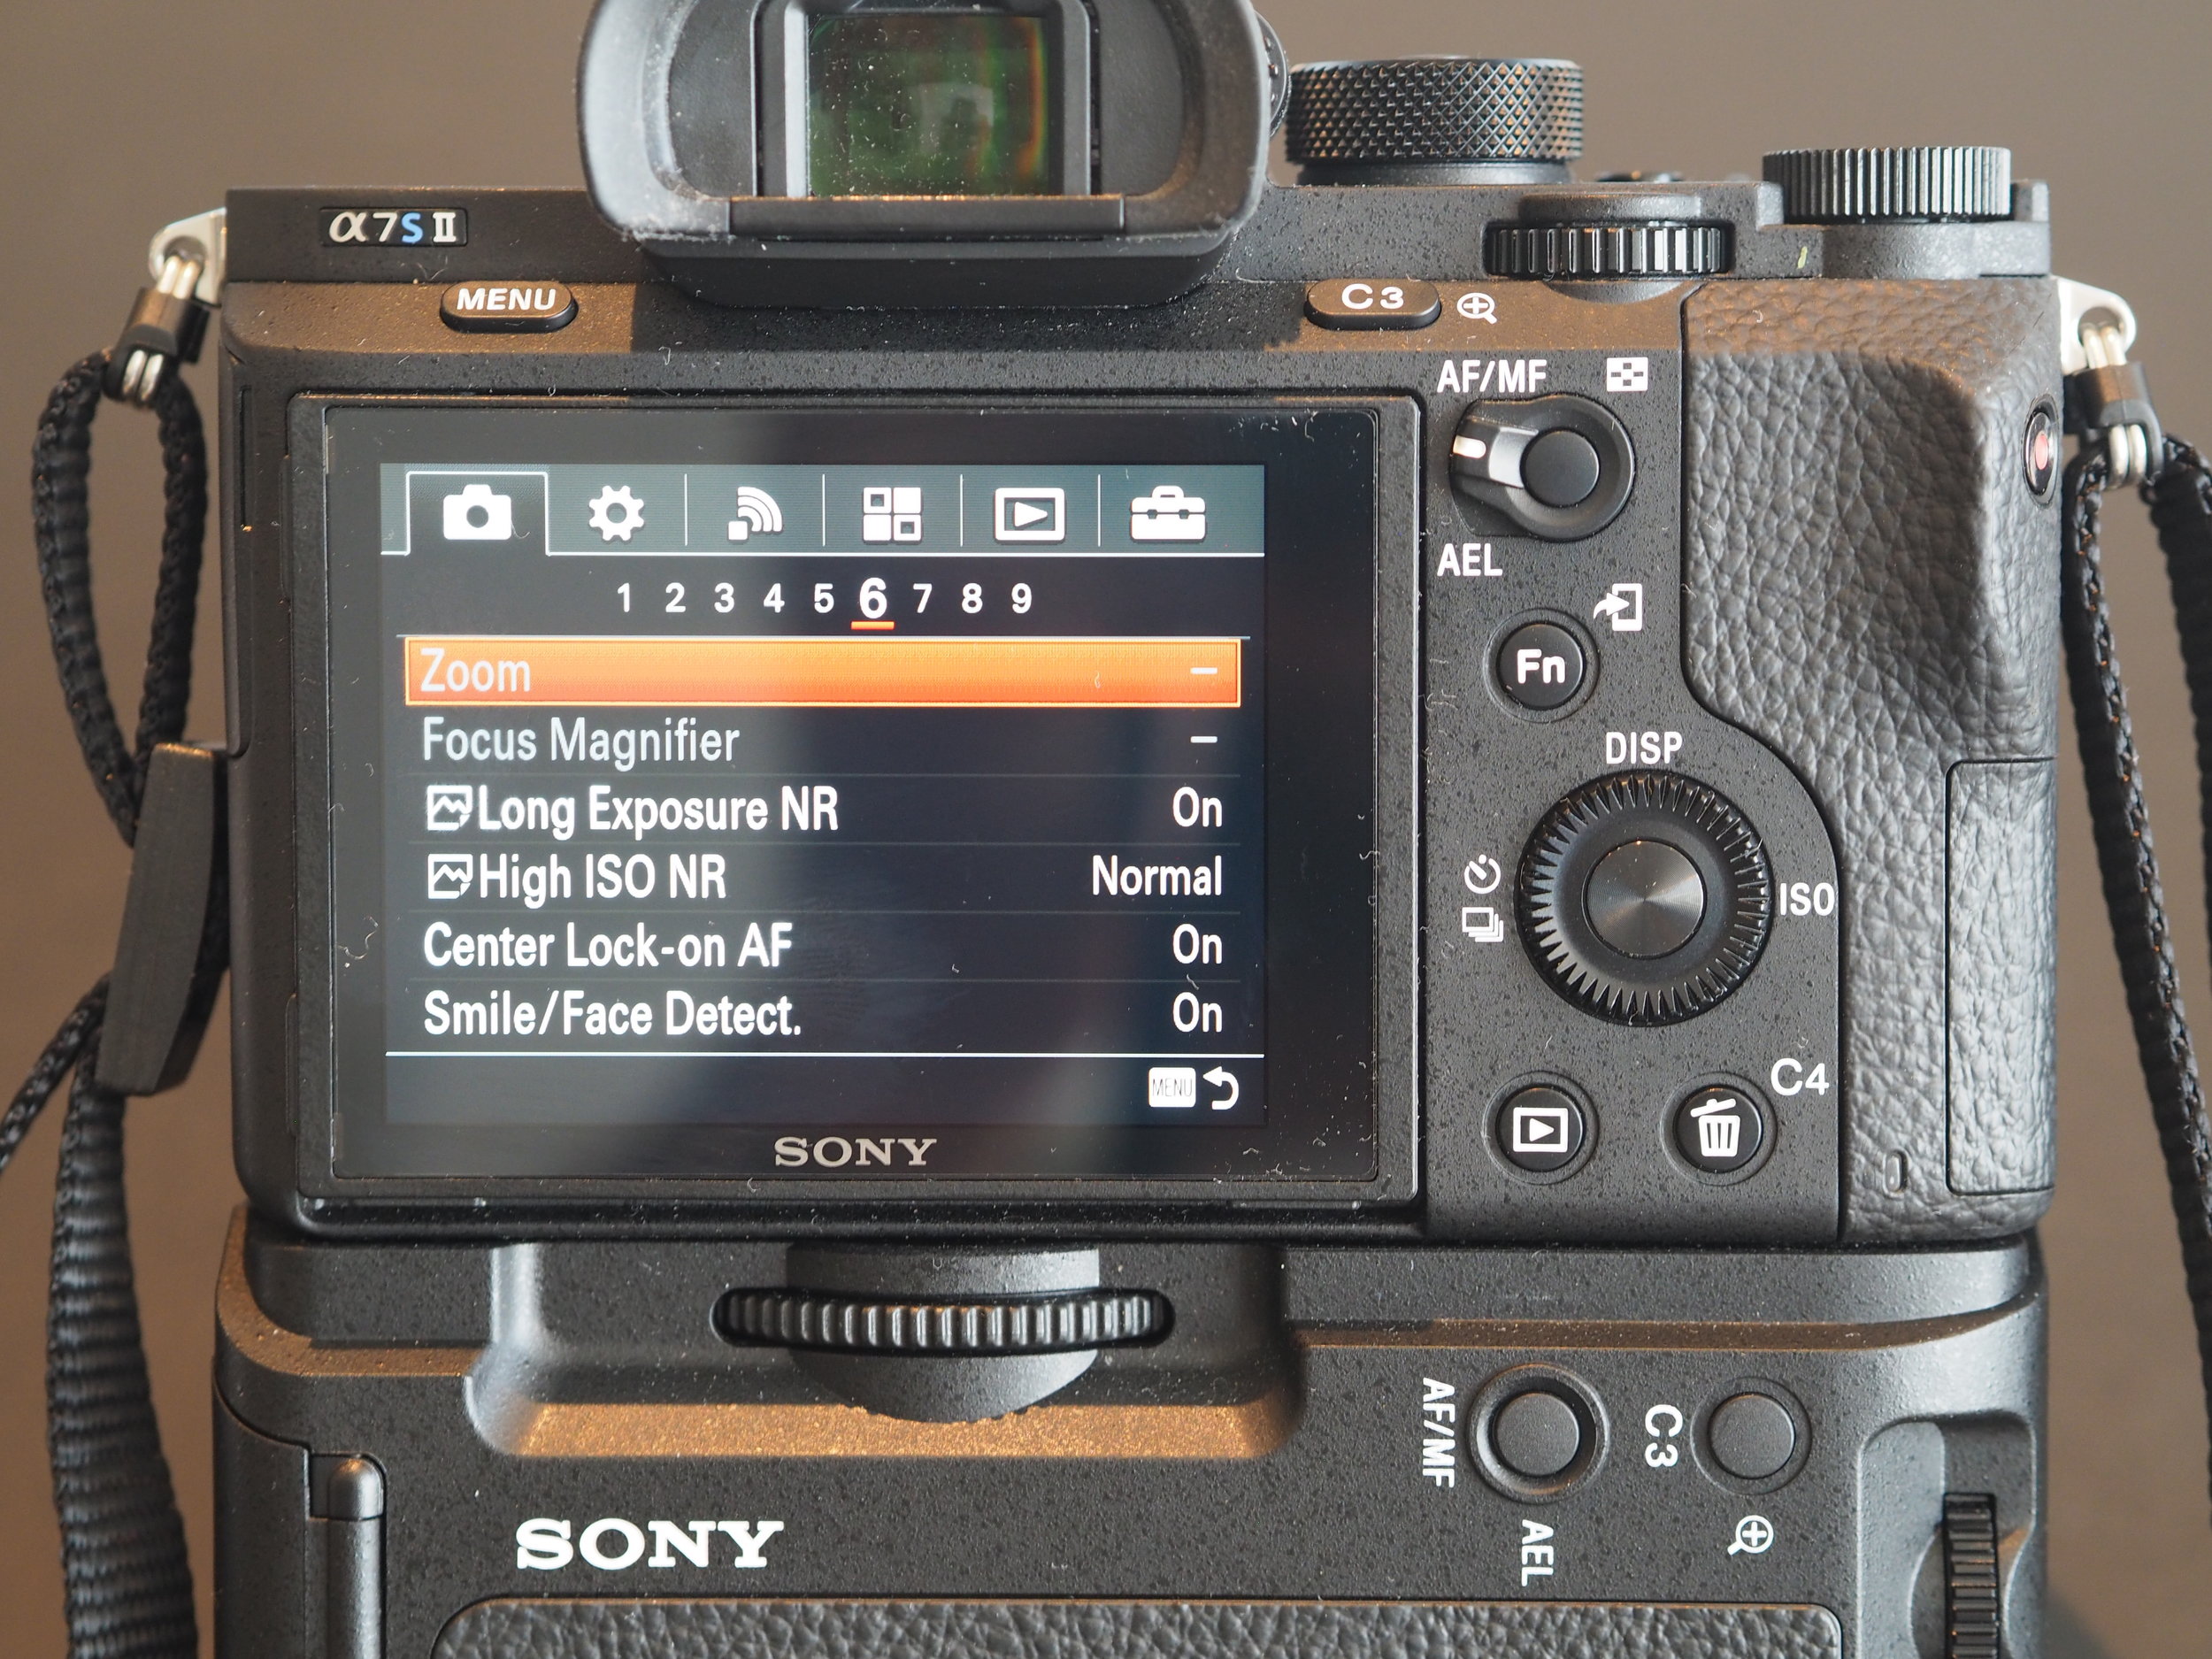
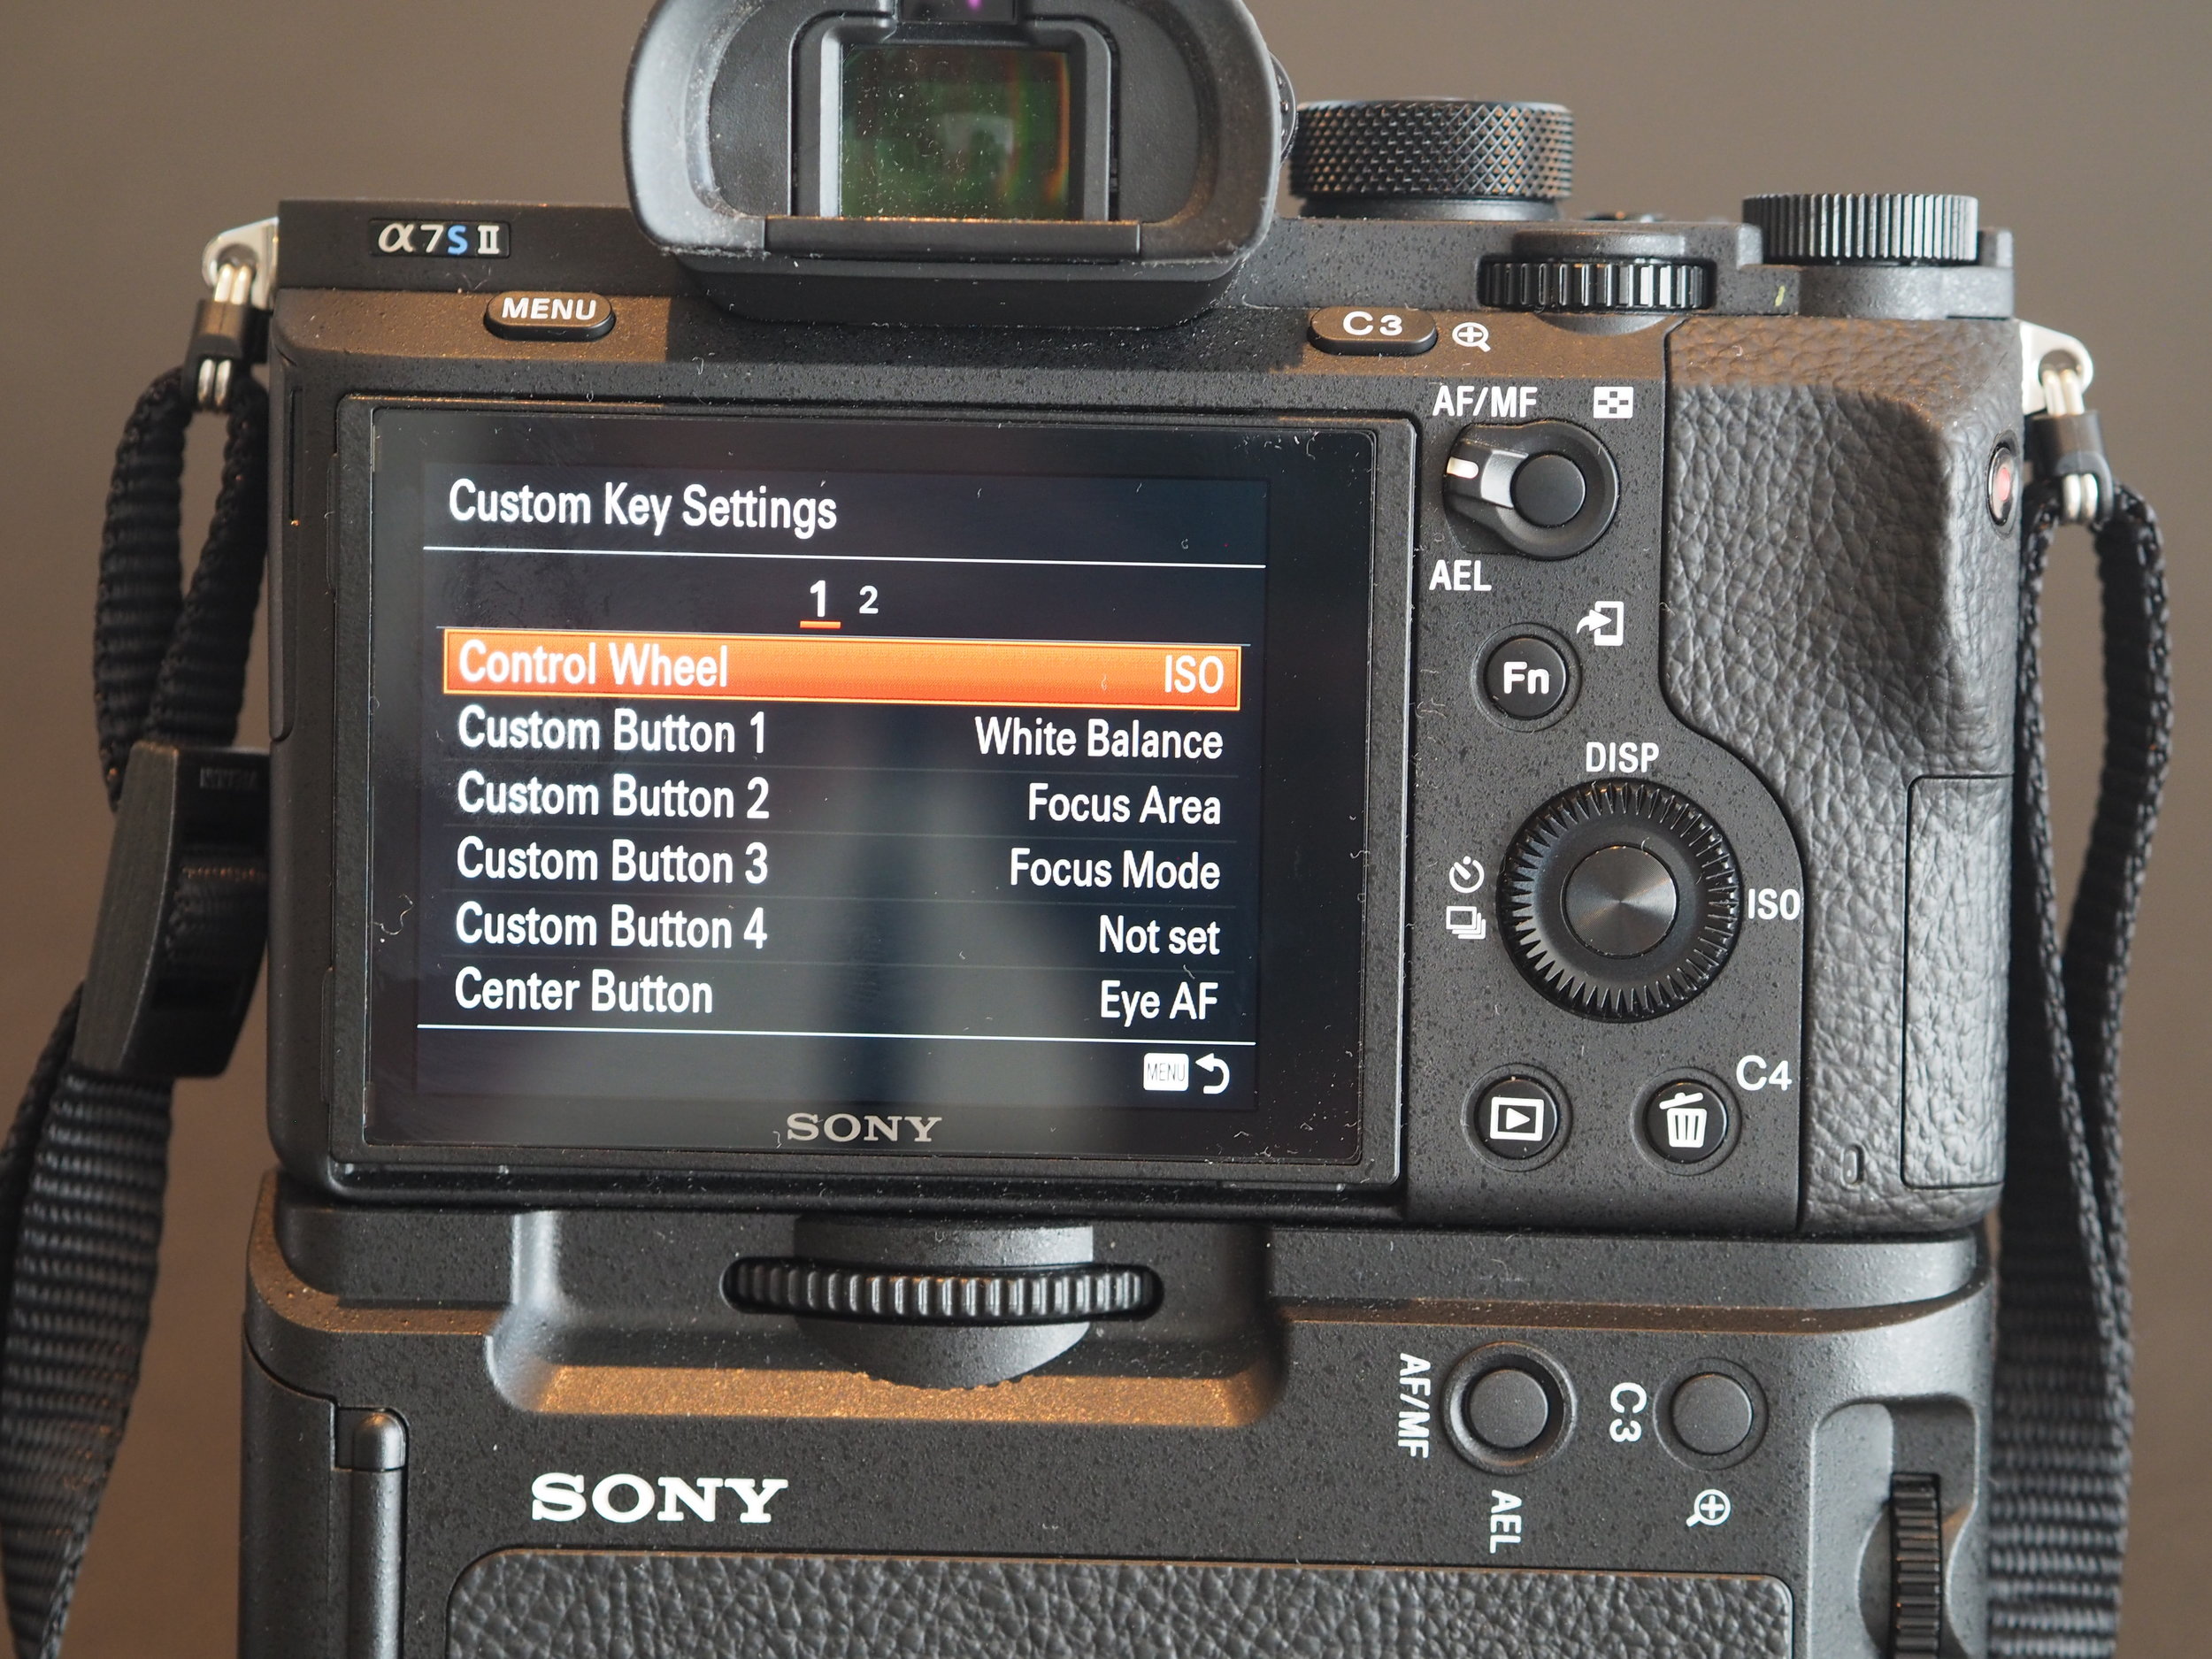
Finally I think the Custom Key Settings on Page 6 are personal to yourselves and totally depends on how you like to shoot. For me the main buttons to customise are the Control Wheel, Control Button 1 (C1), Control Button 2 (C2) and Control Button 3 (C3). As these are the easiest to access during shooting. I've set:
Control Wheel - ISO
Control Button 1 - White Balance
Control Button 2 - Focus Area
ontrol Button 3 - Focus Mode
If you have any other questions regarding my Sony A7SII camera settings, comment on this post and I'll get back to you.
Founder of this eponymous blog, focusing on men's fashion & lifestyle.